¶ Email Alert Config
Email alerts can be configured through the Email Alert Config form, found on the Home menu in the Alerts/Events section. Alerts are configured individually for each user and can be customized to only occur for intersections in certain zones or areas. Alerts by text message can also be configured in this way.
To configure email or text alerts, you must first click the Email Alert Config button on the Home tab. Once you have done this, a selection dialog will appear showing all of the available KITS users.
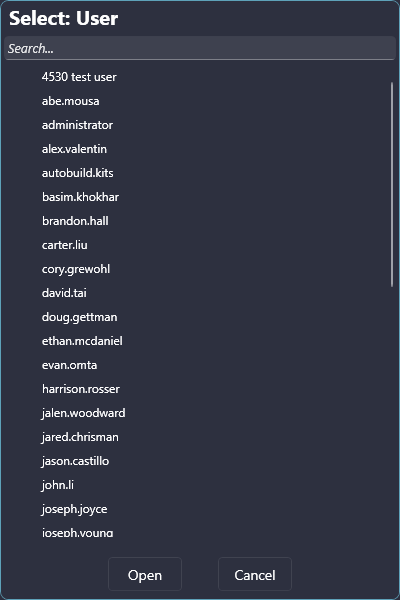

Once a user has been selected, click Open to open the Email Config GUI for that user.
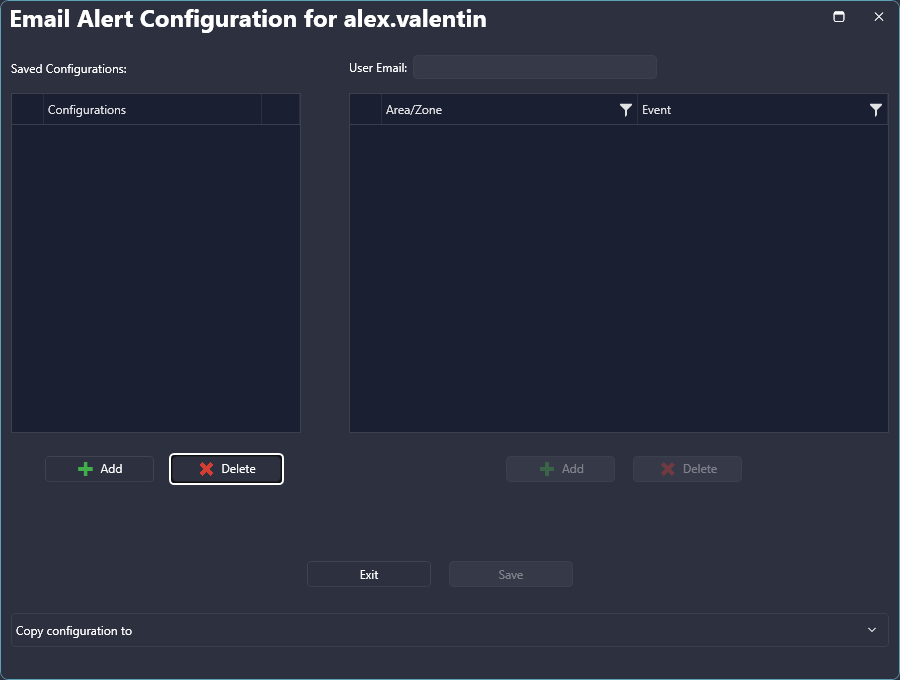
To create an email alert configuration, start by clicking the 'Add' button under the 'Saved Configurations' section on the left side of the form, enter the name of the configuration, and hit Enter to finish creating the configuration.

If the user's email address has been configured through the Users page on the security wizard, the User Email field will be populated with that email address. However, this field can be overridden with a different email address if desired. If a valid email address has not been defined through the security wizard, this field will remain blank and the user must manually enter a valid email address before completing the configuration.
If you would prefer to receive alerts via text message, enter the desired phone number into this field using the following format:
- AT&T: number@txt.att.net
- T-Mobile: number@tmomail.net
- Verizon: number@vtext.com
- Sprint: number@messaging.sprintpcs.com or number@pm.sprint.com
- Virgin Mobile: number@vmobl.com
- Tracfone: number@mmst5.tracfone.com
- Metro PCS: number@mymetropcs.com
- Boost Mobile: number@myboostmobile.com
- Cricket: number@mms.cricketwireless.net
- Nextel: number@messaging.nextel.com
- Alltel: number@message.alltel.com
- Ptel: number@ptel.com
- Suncom: number@tms.suncom.com
- Qwest: number@qwestmp.com
- U.S. Cellular: number@email.uscc.net
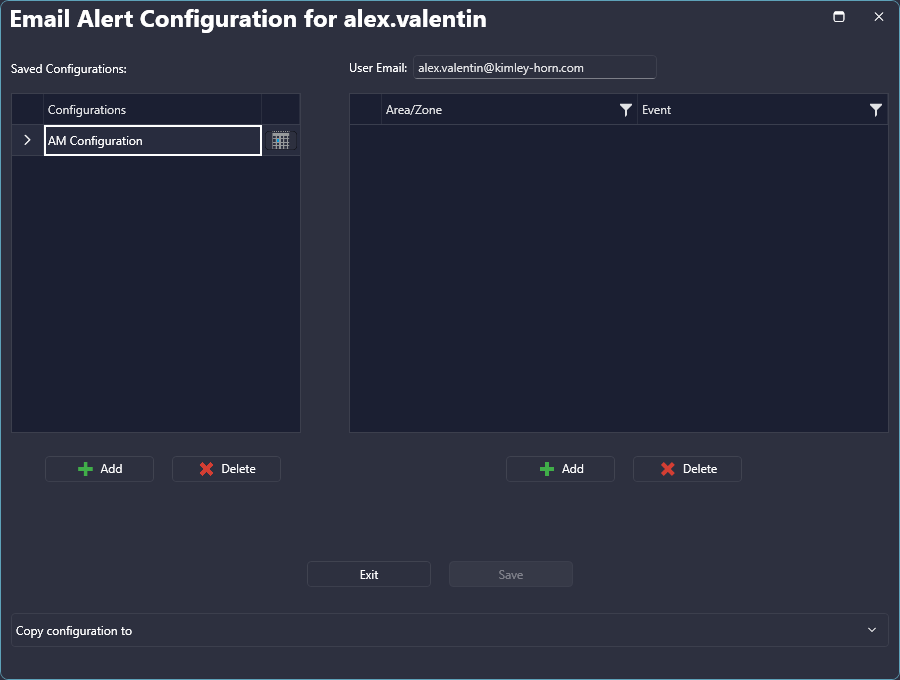
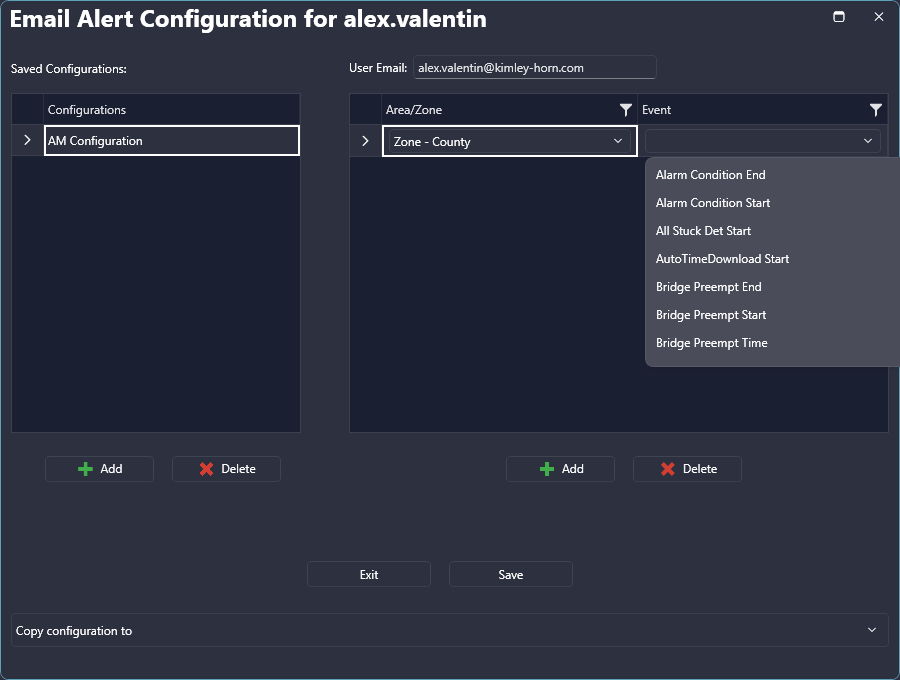
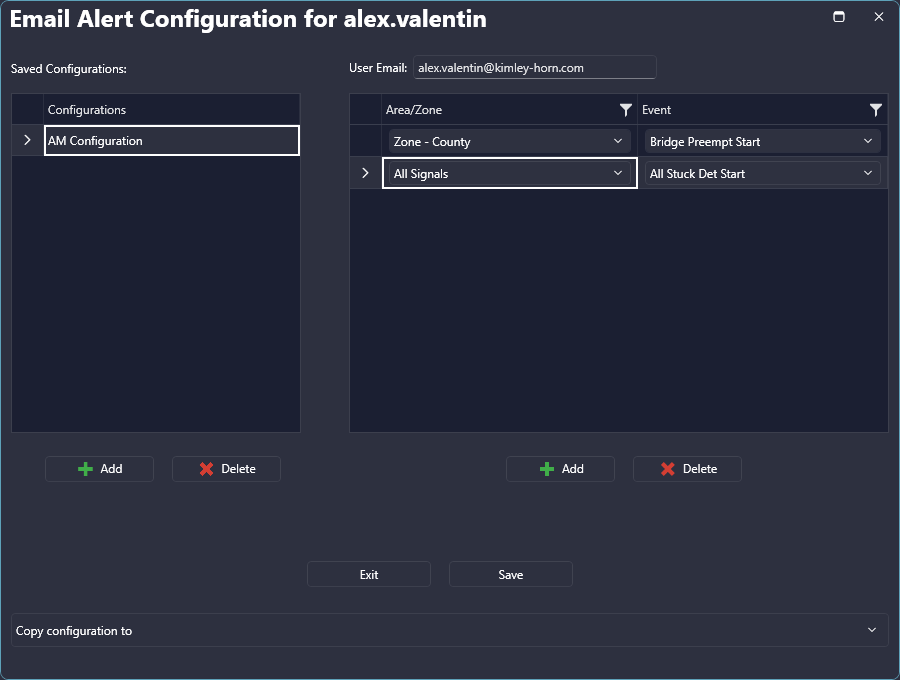
Once the configuration has been successfully added and email address defined, events can be configured through the pane on the right-hand side of the form. To do so, click the 'Add' button under the pane and a new row will be added. Clicking the Area/Zone dropdown for the new row will allow you to specify the area or zone (with Zone - All covering all zones and Area - All covering all areas) that you want to receive the alert for.

After the zone or area has been specified, click the Event dropdown and select the event you want to receive the alert for.

From here, you can repeat the process to add any number of desired events and areas/zones you would like to receive email alerts for.

Once you have finished with the configuration, click Save to save the changes. Before email alerts start getting sent out, however, a schedule must be defined for that configuration. To set up the schedule, click the calendar icon next to the configuration name and the scheduling window will open. Refer to Scheduling Email Alerts for details on how to set up a schedule for a given configuration.
After the configuration has been saved and scheduled, you will begin receiving email alerts in accordance with the configuration.
¶ Setting Persistence for Email Alerts
When configuring events to receive email alerts for, the persistence settings defined in the Event Filter will determine how much of a delay will occur before the alert is received. To set up persistence specifically for email alerts refer to Email Alert Persistence.
¶ Email Alert Persistence
Email alert persistence is configured through the Event Filter in a similar fashion to the regular alert persistence. To define persistence for email alerts, open the Event Filter, select the role that is defined as the master role (usually the administrator role), and configure persistence for any events as shown below.
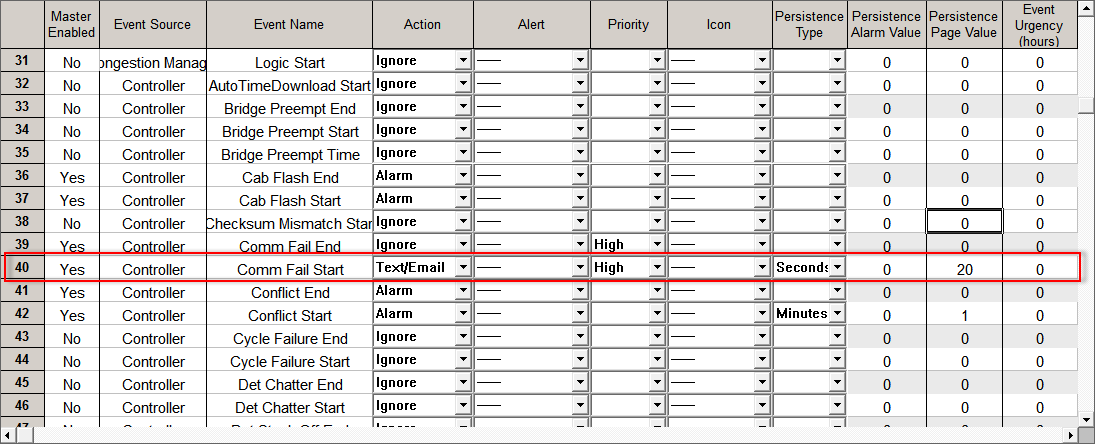

The key elements to configure to ensure that persistence is set up properly are as follows:
- Action - This needs to be set to Text/Email. Setting it as such will also enable regular KITS alerts similar to when it is just set to 'Alarm'
- Persistence Type - Minutes, seconds, or count needs to be specified here
- Persistence Page Value - Set this to the number of seconds/minutes, or the count number that is desired (the value here is relative to the Persistence Type that is specified)
It is important to note that persistence in KITS is a system wide parameter, which is why it must be configured under the master role. So once it is set up in the Event Filter, any users that configure the corresponding event for email alerts will only receive an email for that event if it does not end before the persistence threshold has been reached.
¶ Scheduling Email Alerts
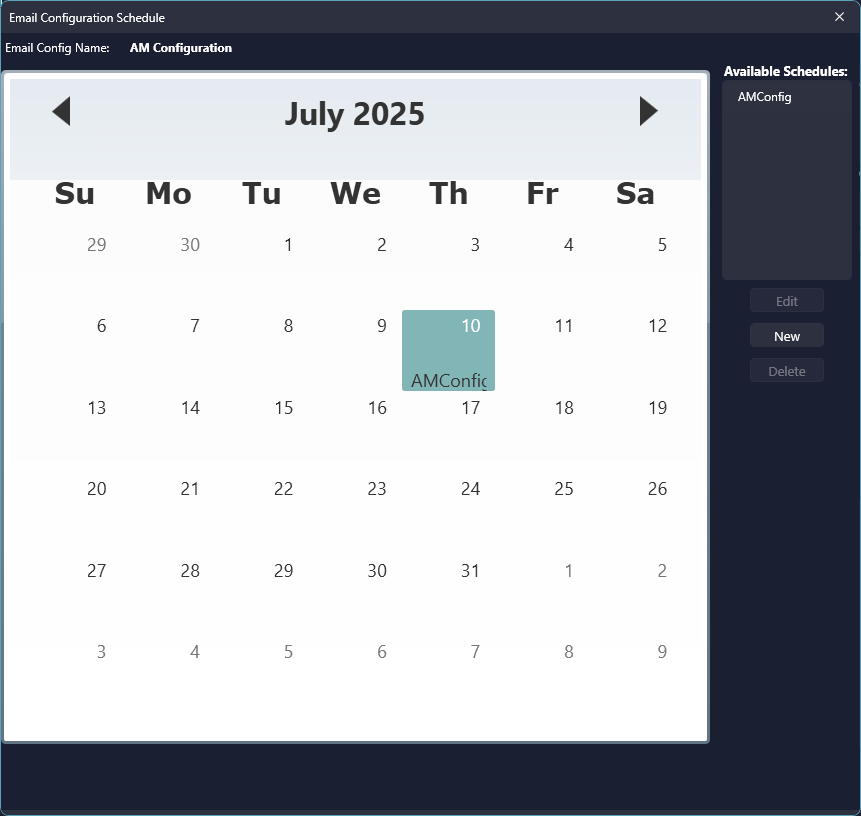
Once all of the desired events and areas/zones have been configured and the configuration has been saved, a schedule for the configuration needs to be specified before email alerts start getting sent out. To schedule the email alert configuration, click on the calendar icon to the right of the configuration name (under the left-hand pane) and the schedule page will open.
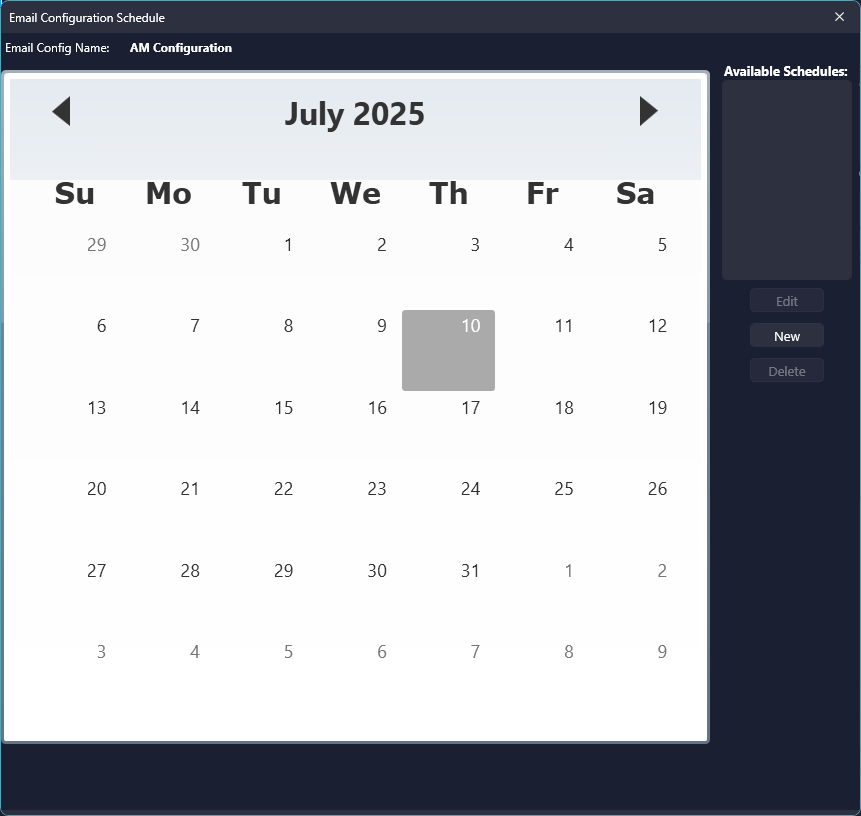

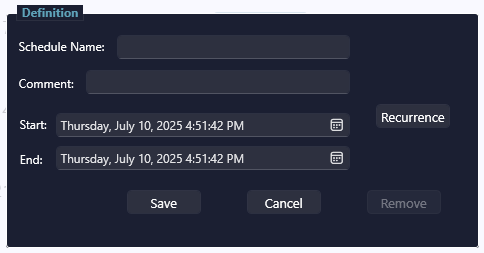
To schedule the configuration, click the New button and enter the desired schedule settings as shown below.
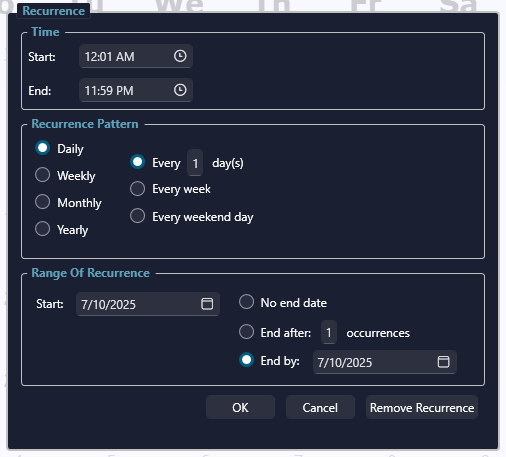
If you want to set up a recurring schedule, click the Recurrence button and specify the desired schedule.
Once the schedule has been configured, click Save and you will see the schedule reflected on the calendar.

After the schedule has been configured as desired, you may close the scheduling window.