¶ Detector Configuration Page
¶ Access the Detector Configuration Page
- Navigate to the Intersections Tab's Definitions section.
- Look for the Detectors Button and click on it.

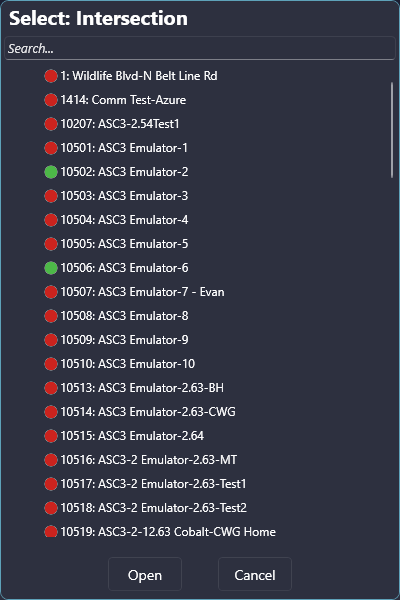
¶ Selecting an Intersection
After clicking the detector button, an intersection extent popup will appear, asking you to choose an intersection. To select an intersection, follow these steps:
- In the Select Intersection Viewer, you can search for your intersection by name or intersection number.
- The small circle to the left of each intersection represents the communication status.
- Double-click on an intersection or select an intersection and click continue.
¶ Editing Detector Information
Once you have accessed the intersection detector configuration, you can edit the detector information using the configuration grid. Here's how:
- The configuration grid allows you to edit detector information for all 64 detector slots in the controller simultaneously.
- You can filter the columns you see based on the task you're performing with the configuration. Choose from the following options:
- All Det: Shows all possible detector properties.
- System/Count/Local/Speed Trap Det: Shows only the properties relevant to these types of detectors.
- ATSPM Det: Shows only the properties that ATSPM uses.
- Kadence Det: Shows only the properties that Kadence uses.
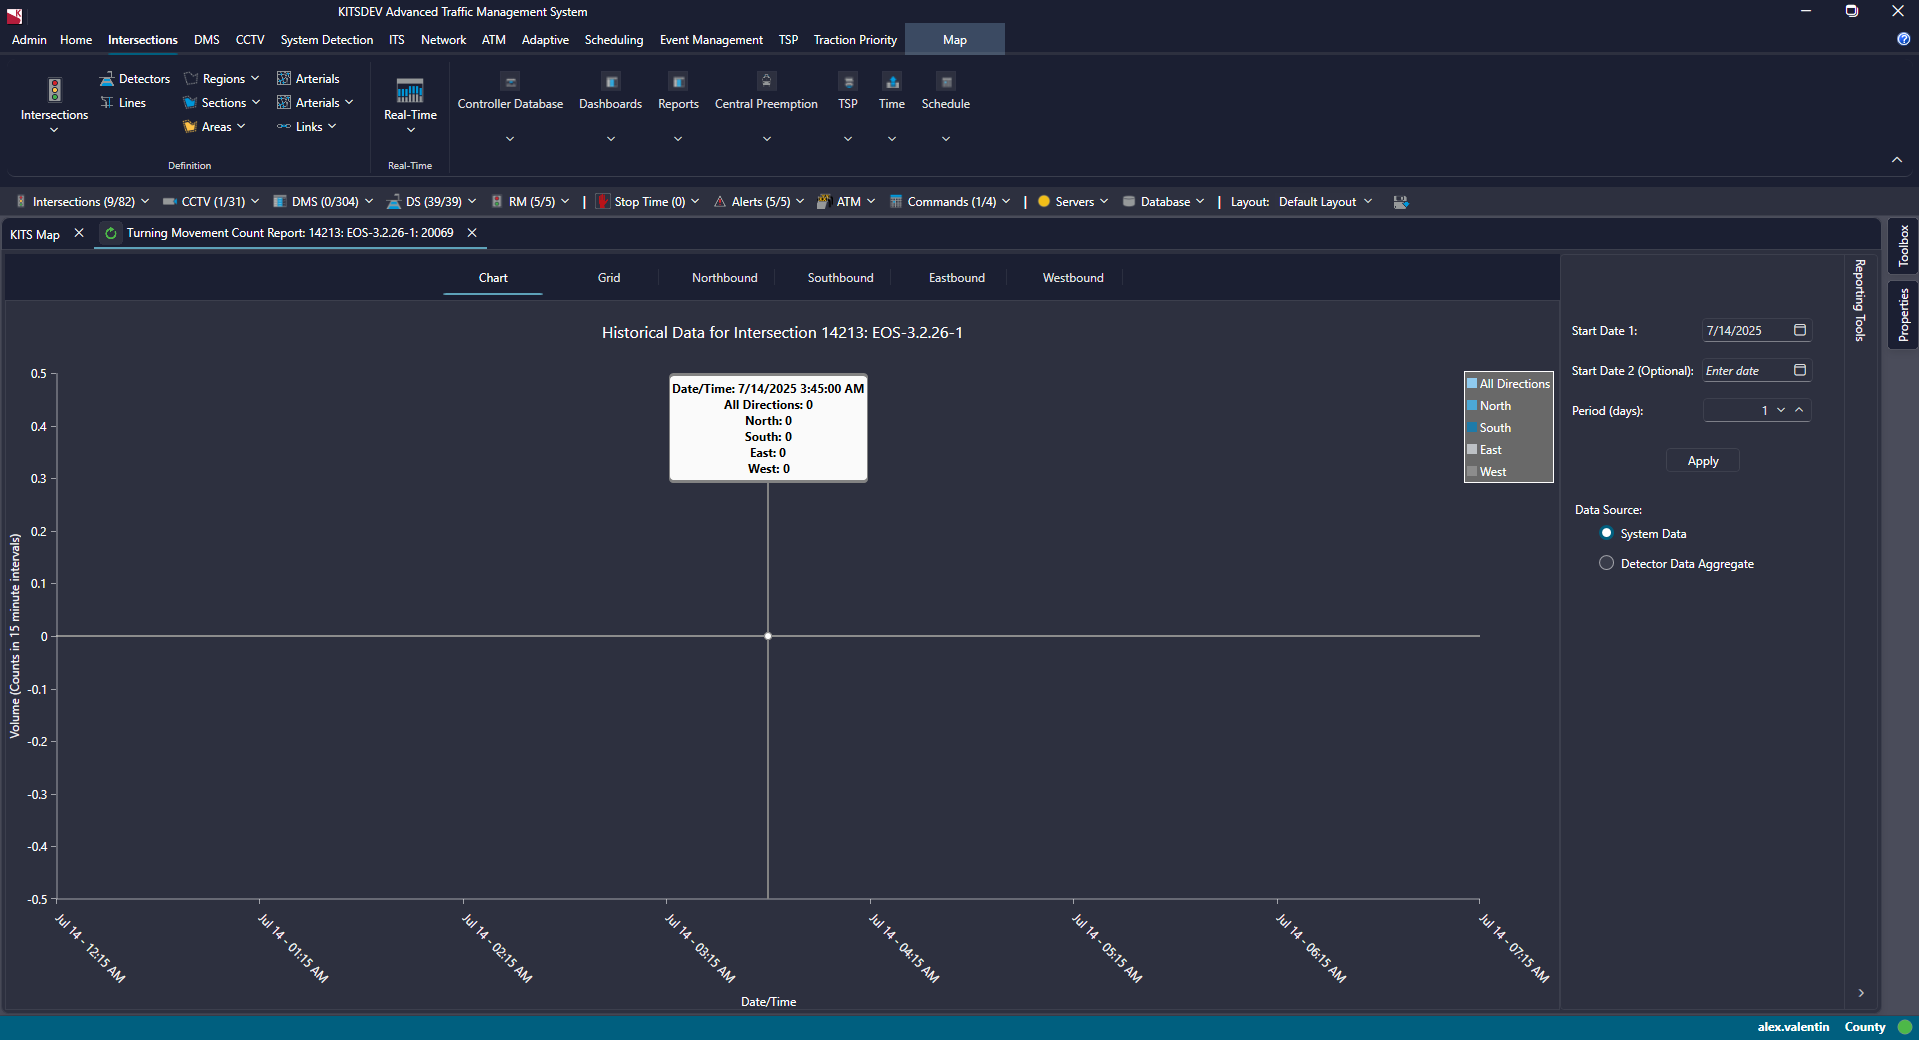
- TMC Det: Shows only the properties that the Turning Movement Count Report (TMC) uses.
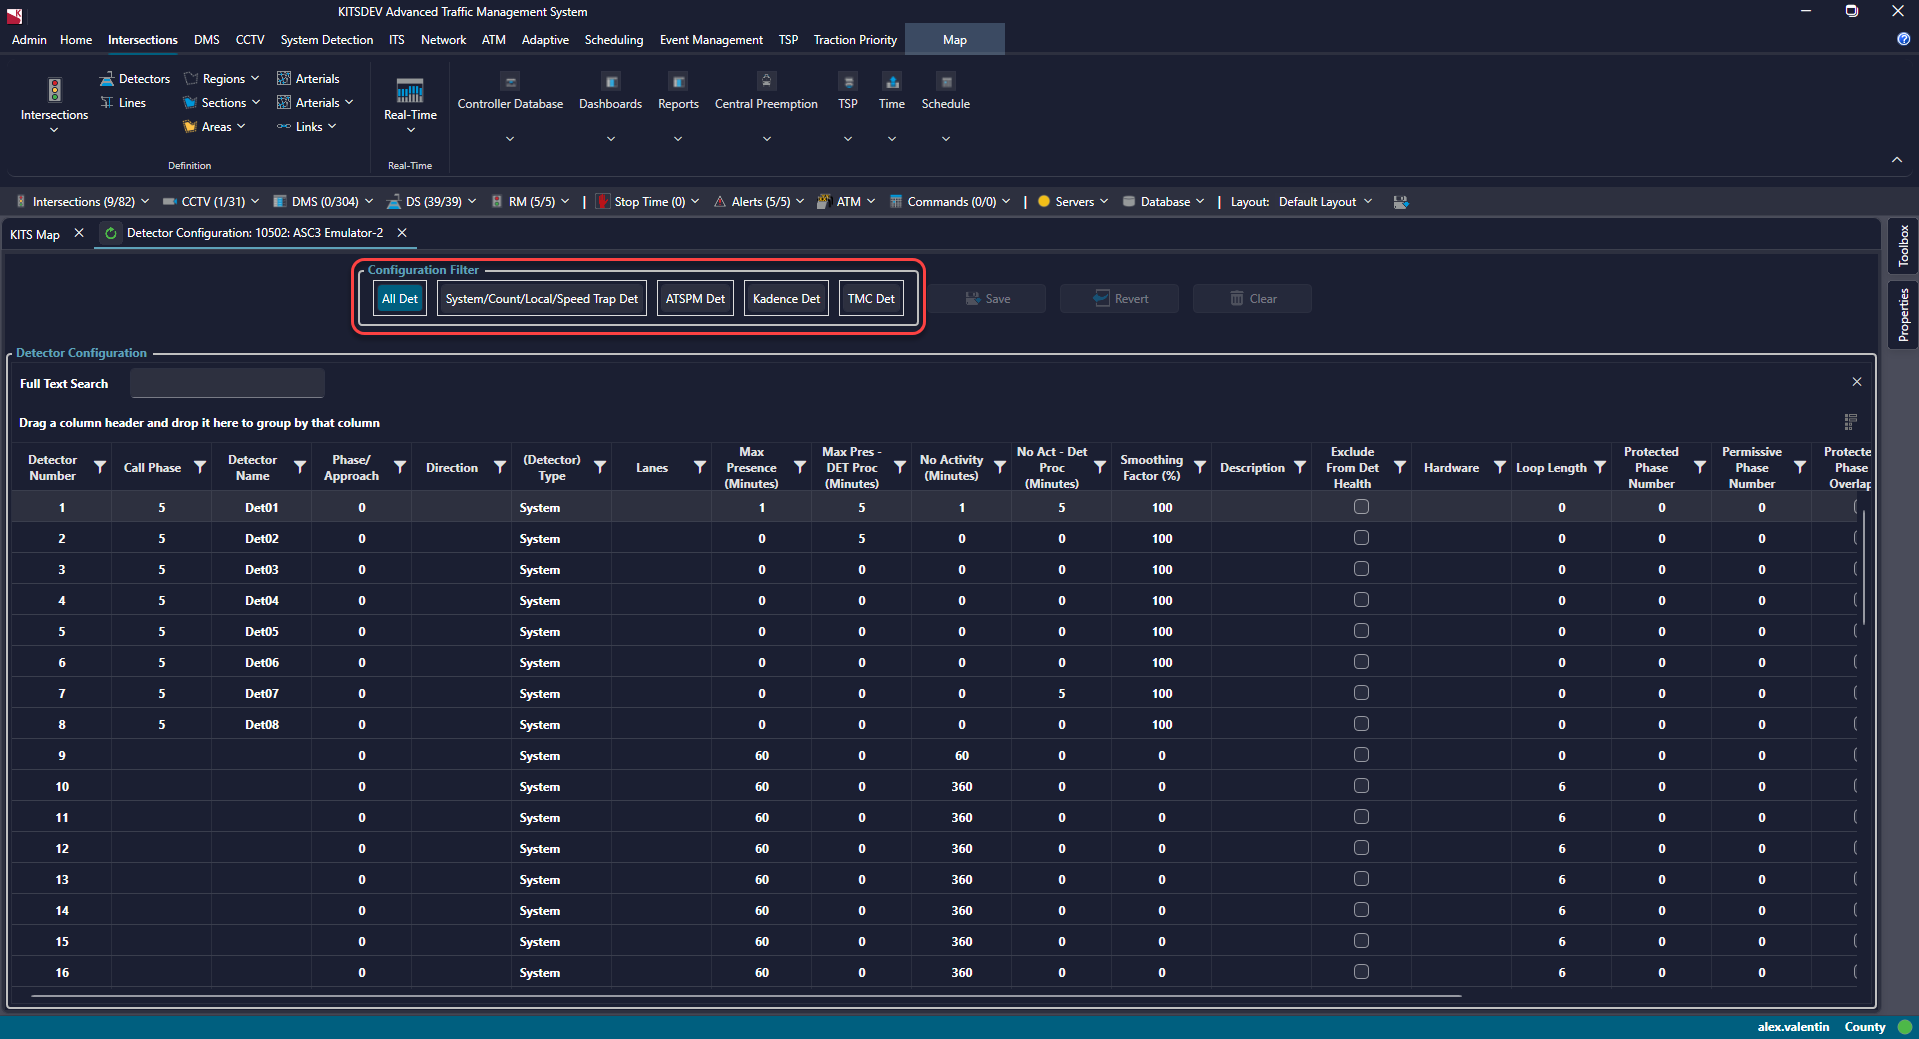
- Detector Number is read-only
- Call Phase is auto-populated from the intersection definitions
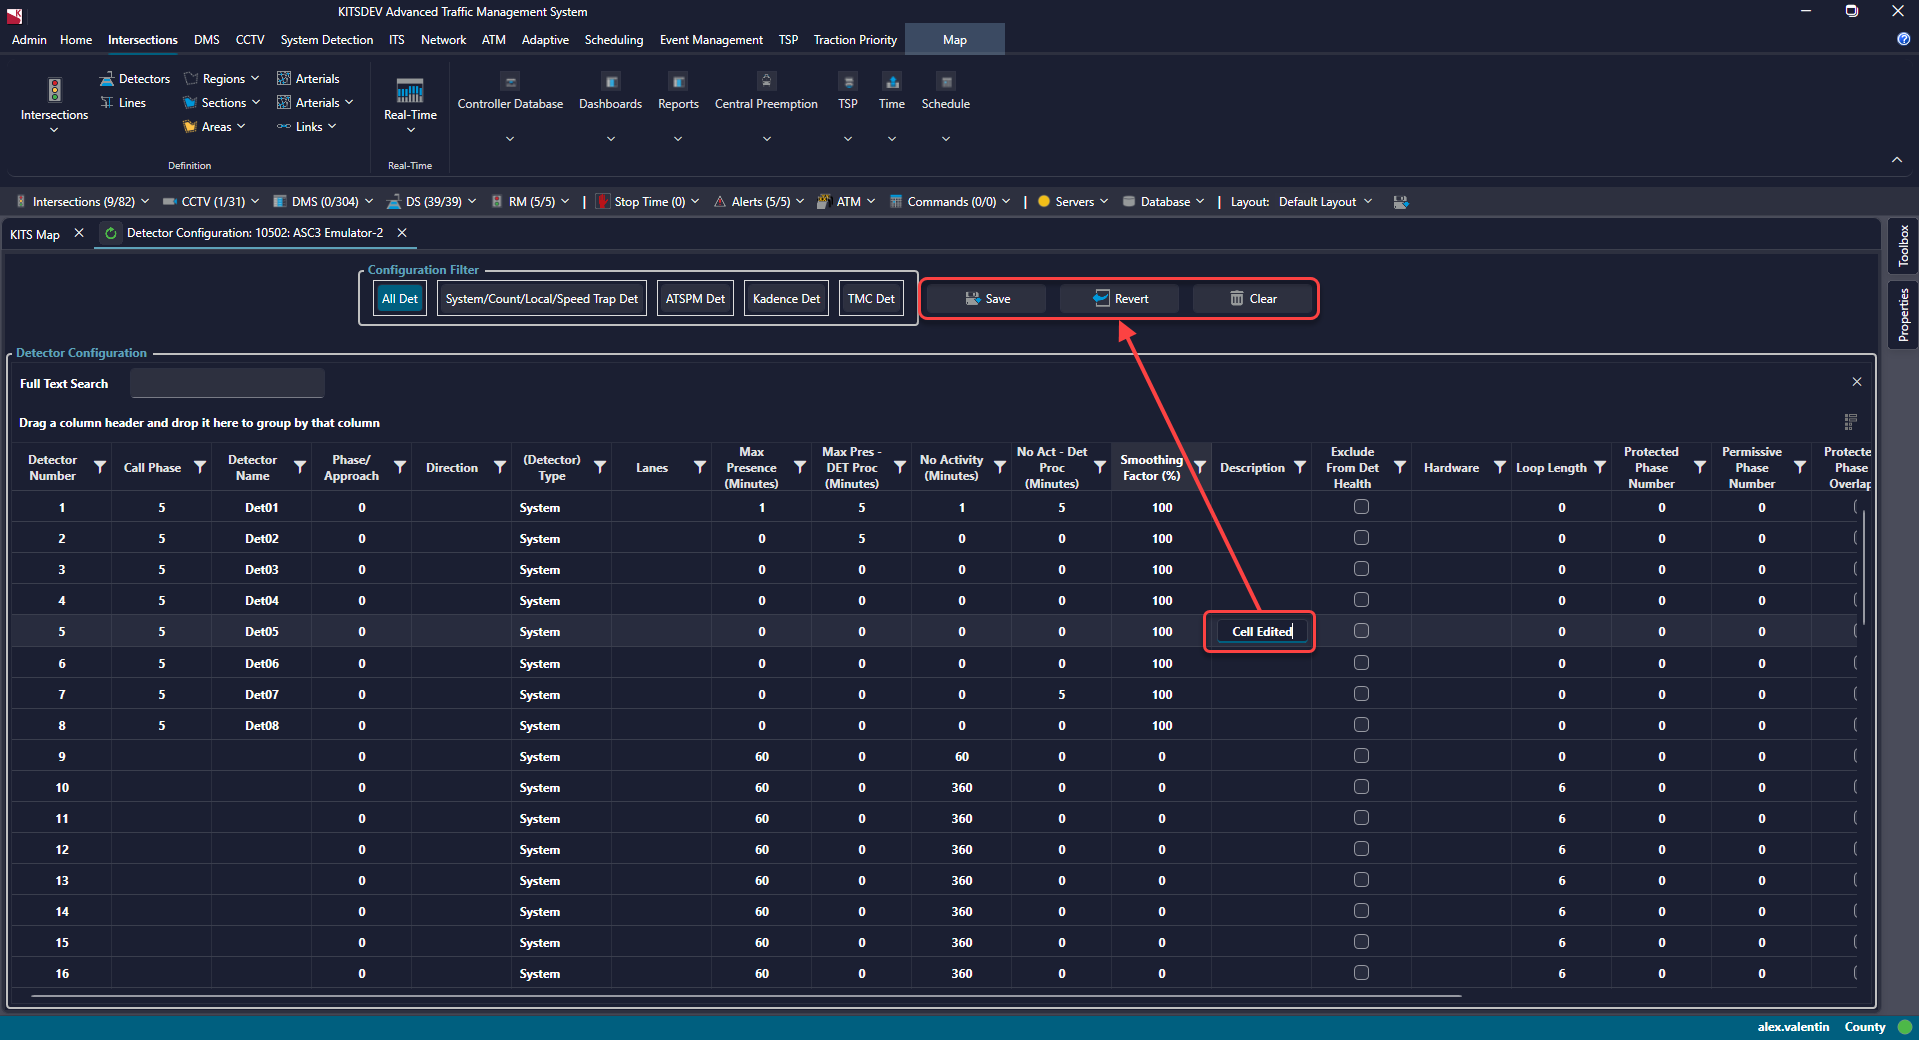
¶ Saving, Reverting, and Clearing Changes:
After making changes to the configuration, the Save, Revert, and Clear buttons become enabled. Here's what each button does:
- Save: Saves the current grid layout to the database as your detector configuration.
- Revert: Reloads the last saved configuration, reverting ALL changes made since the last save.
- Clear: Reverts the currently selected row/rows to the detector's default values. Use shift-click for section selection and Ctrl-click for individual selection.
¶ Integration with the TMC
On the Detector Configuration page, there is a filter for properties that affect the Turning Movement Count Report (TMC). Follow these guidelines for integration:
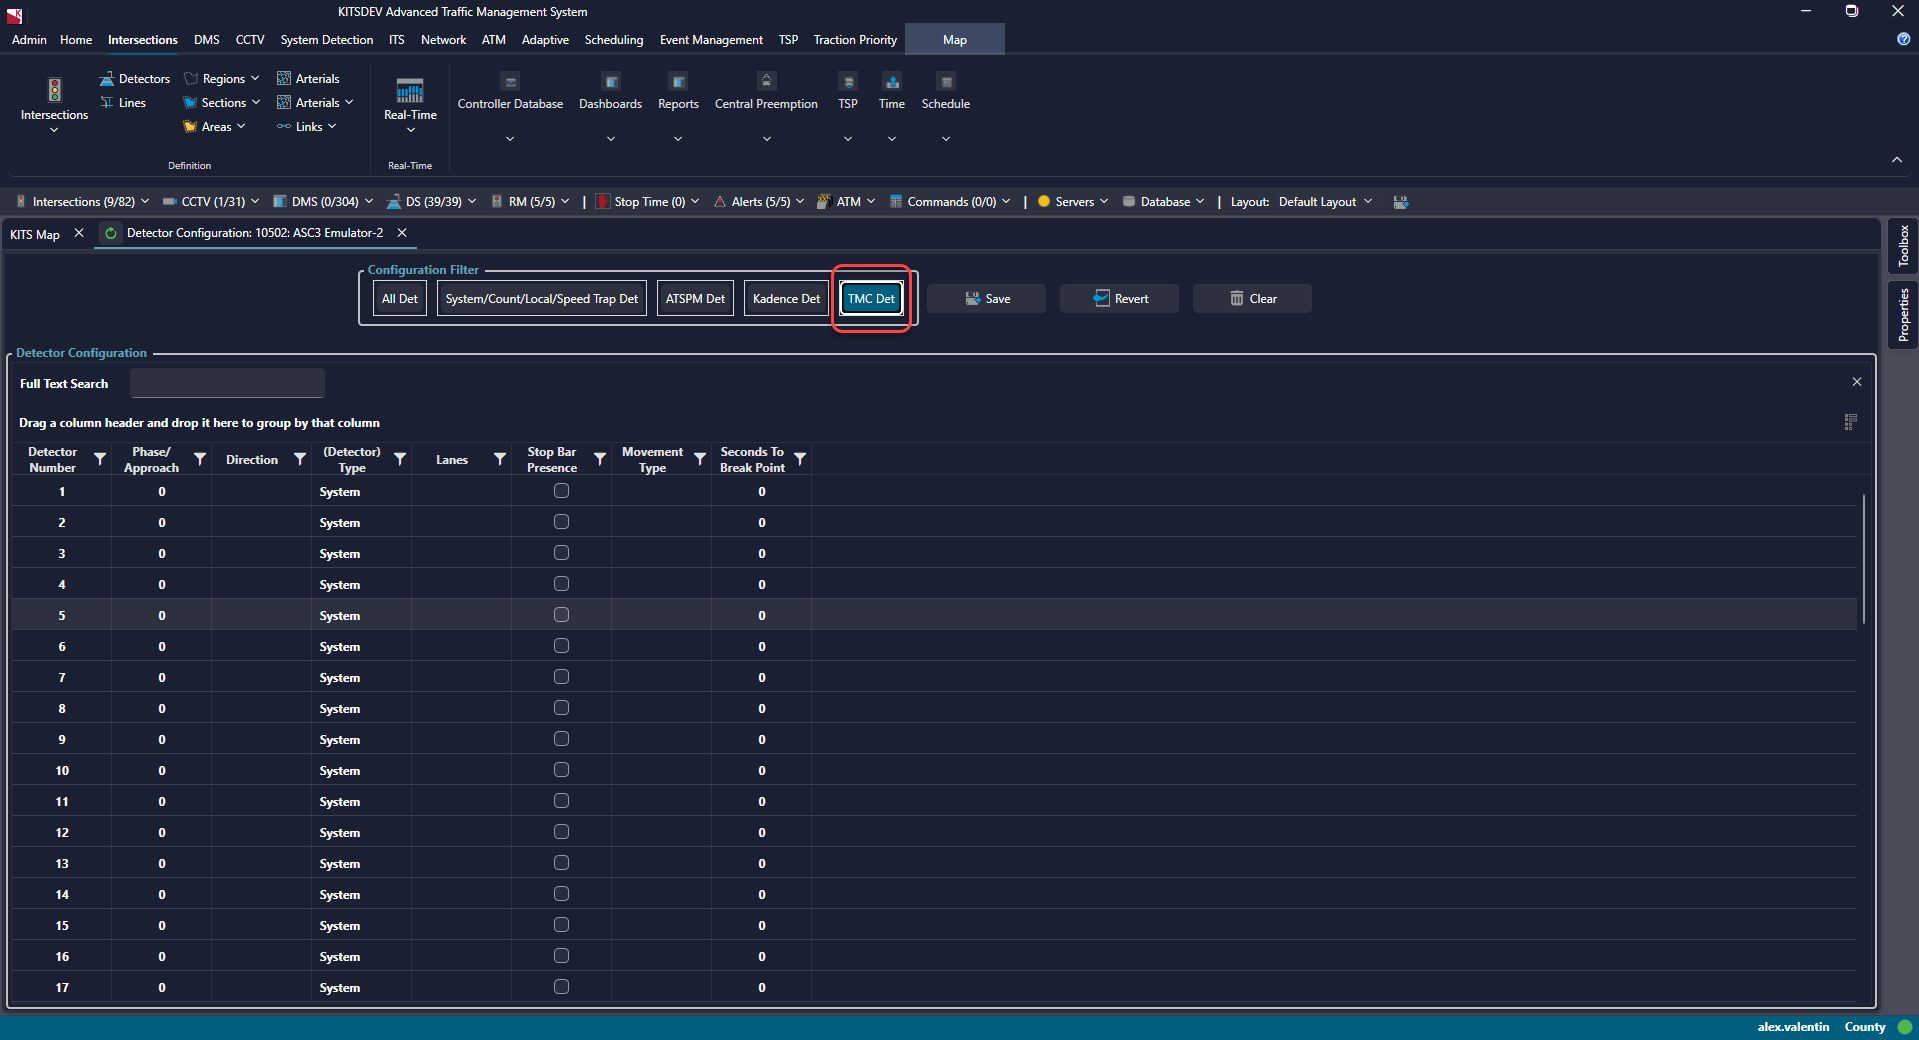
- The only field REQUIRED for the detector to populate data in the Turning Movement Count Report is the Stop Bar Checkbox.
- The TMC report ONLY reports Stop Bar detector data.
- The rest of the fields are used to identify those detectors in the report and are configured by the user.
¶ Detector Alerts
There are two ways to configure controllers and KITS to generate alerts based on detector data.
¶ Option 1
To use the controller's method of generating alerts, System Detectors must be enabled and values should be configured for Max Presence and No Activity.
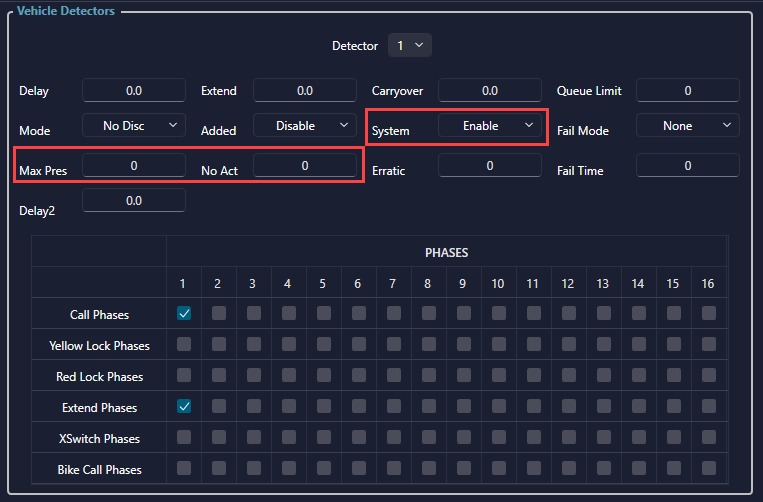
These alerts will come straight from the controller. In the Master Alert Config screen of KITS, the corresponding alerts are:
- Max Presence Fault Start/End
- No Activity Fault Start/End
¶ Option 2
To use KITS to generate alerts, detectors must be configured in the KITS Detector Configuration screen with values for Max Presence and No Activity.
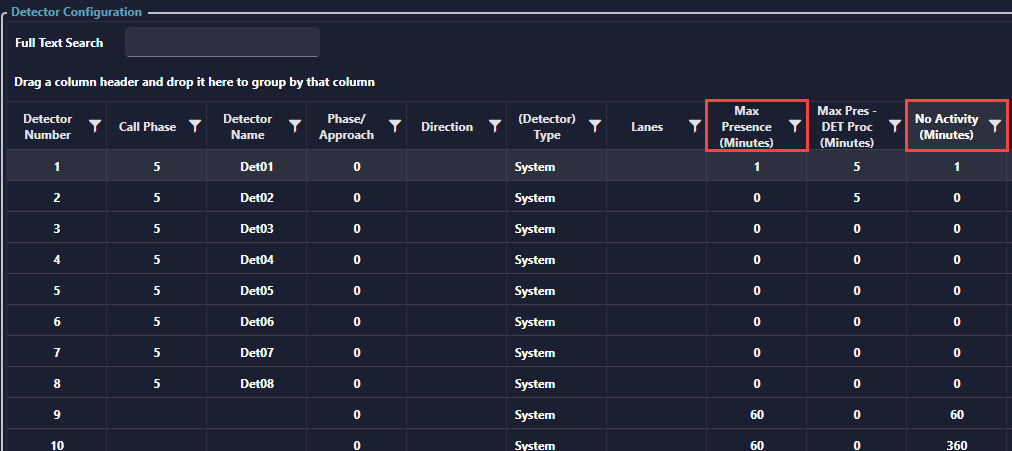
System Detectors must still be enabled via the controller pages for KITS to poll volume and occupancy.
In this configuration, KITS will keep track of the data coming back from the detectors and generate alerts. In the Master Alert Config screen of KITS, the corresponding alerts are:
- Det Stuck On Start/End
- Det Stuck Off Start/End