¶ Creating a Smart Priority Zone
To create a new Priority Zone, navigate to the Smart Priority tab on the ribbon and then click the Priority Zones dropdown.

An intersection selection window will pop up. Select which intersection a new Priority Zone should be created for and click Open.
The following window will open:
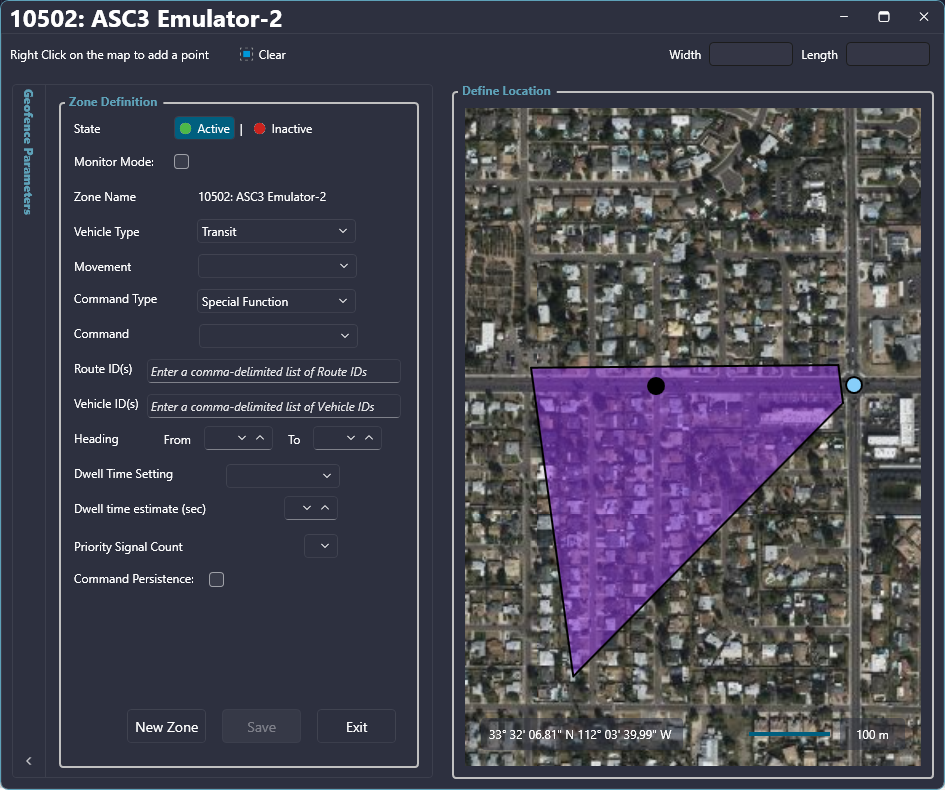
The Zone Definition section allows various parameters to be set for the created zone. The map on the right side of the window allows the zone location to be defined.
To define the location, right-click on the map to add a point. Keep right-clicking on the map to continue adding points. To move an existing point, click and drag on the point and move it to the desired location. To remove a point, right-click on top of an existing point.
Once the zone is created, use the Zone Definition section to edit various parameters related to the newly created priority zone.
| Control | Description |
| Check In | A Check In zone will send a command when a vehicle is in the vicinity |
| Check Out | A Check Out zone will cancel a command when a vehicle is in the vicinity |
| Zone Name | Displays the zone name |
| Type |
Select which type of vehicle the priority zone is for Options include Bus, Emergency Vehicle, Light Rail, Bicycle, Horse and Buggy, and Checkout Zone |
| Movement | Select which direction and movement this zone correlates to |
| Command Type |
Select which command type Options include Preemption, Special Function, Priority Command, and Low Priority |
| Command | Specify the exact command. The selections in this dropdown depend on the Command Type selected |
| Heading | The direction the vehicle needs to be traveling in the zone to be detected. These values should auto-populate based on the Smart Priority zone drawn on the map. North = 0°, East = 90°, South = 180°, and West = 270°. From and To provide a range so that any vehicle detected within that heading range will be detected. |
| Speed | Sets the minimum speed threshold |
| Time to Arrival | Sets the time to arrival to the signal based on the speed and length of the zone from entering the zone to the signal |
| Check-in Timeout | The maximum time threshold a vehicle can be in the check-in zone activating the command before the command is canceled. After a certain amount of time, if the vehicle is still there or if there's a read error, the command will cancel instead of getting stuck on. |
Once all the parameters are set, click Save. A popup will appear to confirm that the zone has been saved. From this point, another zone can be created by clicking the New Zone button or the window can be closed by clicking Exit.
Pressing the New Zone button will change the previous zone created yellow to indicate that it's an existing zone, and the previous steps can be followed to create another zone.