¶ Supported Controllers
KITS offers comprehensive support on NTCIP and other types of controllers including the latest firmware versions as well as older versions. This functionality includes the ability to upload/download controller pages from/to the controller, view real-time intersection timing, time upload/download, schedule special events, and command plans.
The types of traffic signal controllers which are supported in KITS are listed below:
- ASC3
- D4
- EOS
- LACO 4E
- NextPhase
- Peek 3000E
- SEPAC
- MaxTime
- TSCP
- ZDC
For more information regarding the controller pages for each specific controller, refer to the programming manuals for each controller type.
¶ Controller Pages Guide
Controller pages show the controller data that is on the controller and in the KITS database. All controller pages for each controller type use a similar set of controls to navigate between pages, save differences, upload data from the controller, download data to the controller, and perform a variety of other tasks.
Most controller pages have the same dedicated ribbon menu (this is a context sensitive ribbon menu that only shows when controller pages are open) as shown below. Some controller pages, namely ASC3, still use KITS Classic controller pages. The controls are virtually the same, and both the old and new user interfaces are listed within this wiki.
After opening the Controller Pages, a dedicated ribbon tab with the necessary controller functionality will be displayed as shown:

¶ Save / Revert
Once a change is made to one of the Quick Edit forms, the Save button seen above will be enabled. After selecting Save, the prompt below will appear allowing the user to add Comments and finalize the save. The Username and Time fields will be automatically populated with the current user and time.
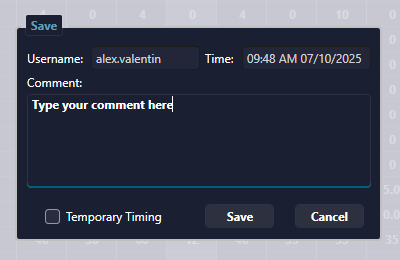
Selecting the Cancel button prior to saving will reverse any unsaved changes. By checking Temporary Timing, the history record for the save will be flagged as temporary.
¶ History
Clicking the History button will show a list of all historical changes that have been made to the controller pages.
Clicking on the Compare button for a given entry will show the differences between the historical and the current data saved in the controller pages. When the comparison window is displayed, clicking Revert will revert the data back to the controller data at the time of the ‘Date Changed’ time. Clicking Back will bring the user back to the controller page UI.
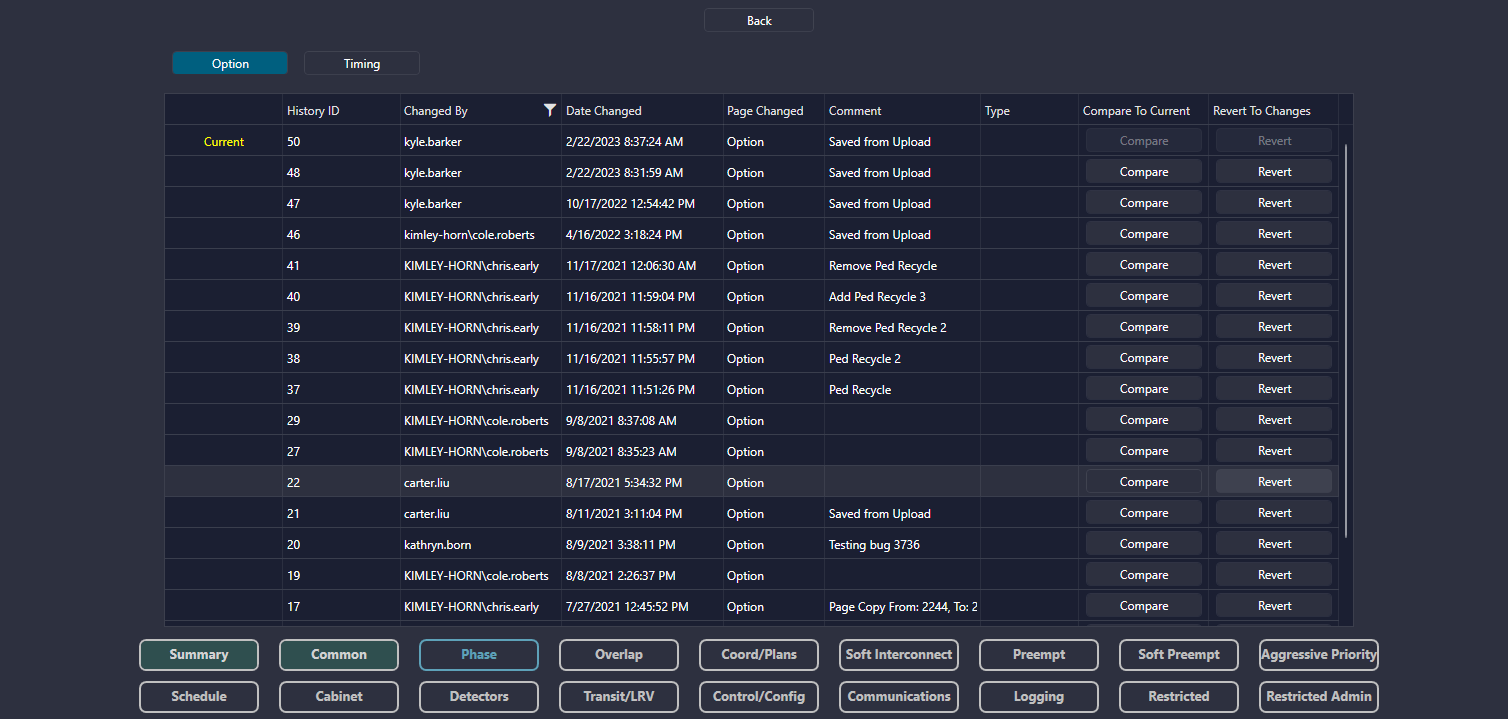
Clicking the Print button will generate a pdf of assorted controller page data from the central database. Once the file has been created, it can be opened in the users pdf viewer of choice. From there, it can be sent to a printer.
¶ Copy
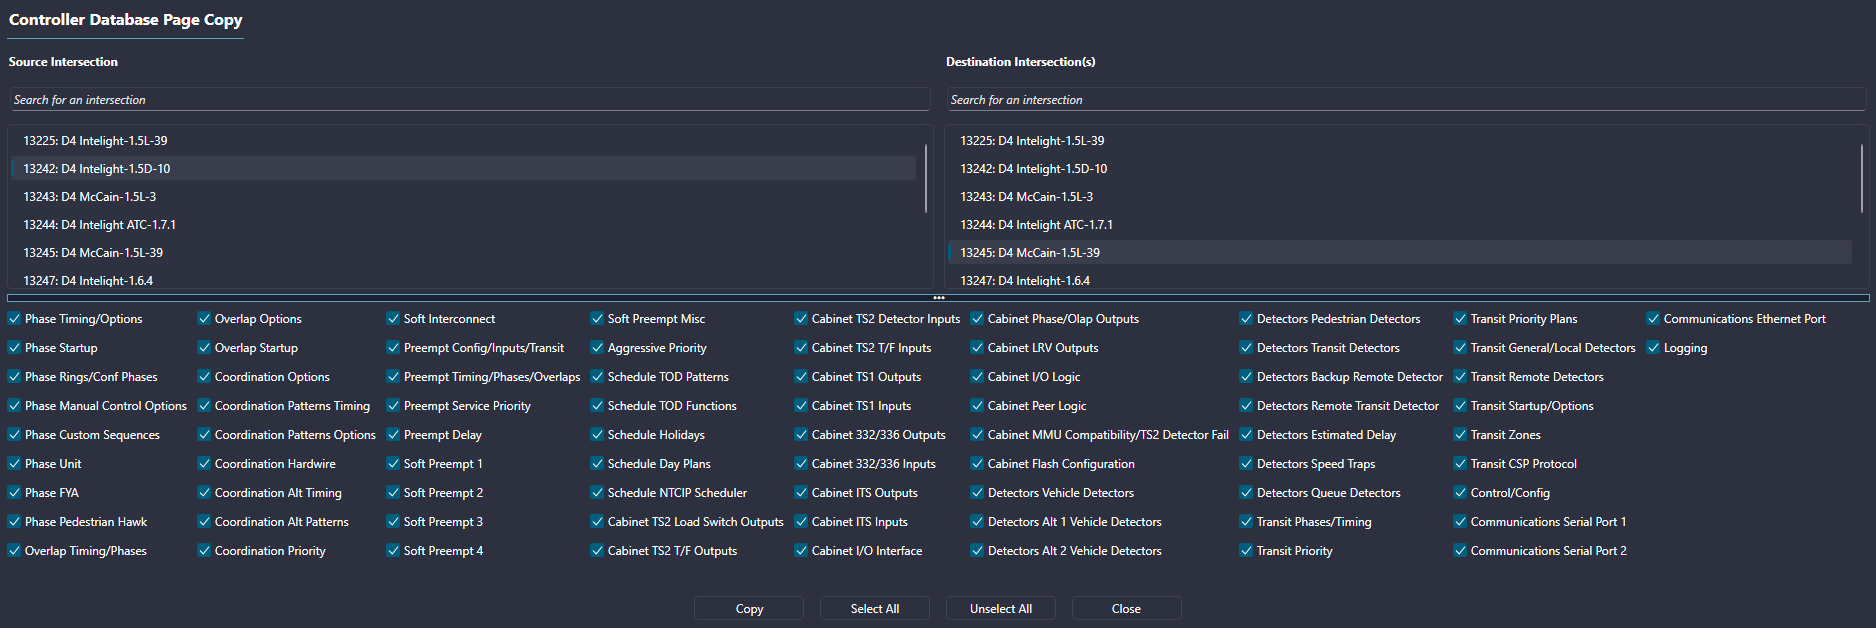
¶ Copy Page
On the Intersections tab, within a controller page, locate the Copy feature and select Copy Page.
In Copy Page, select the source signals you would like to copy from, and the destination(s) signals you would like to copy to. You may select one or more pages to copy. If needed, use the buttons on the bottom of the form to Select All or Unselect All. Selecting the Copy button will implement the copy specified in the form. Selecting the Cancel button will close the form without implementing any changes.
¶ Copy Plan
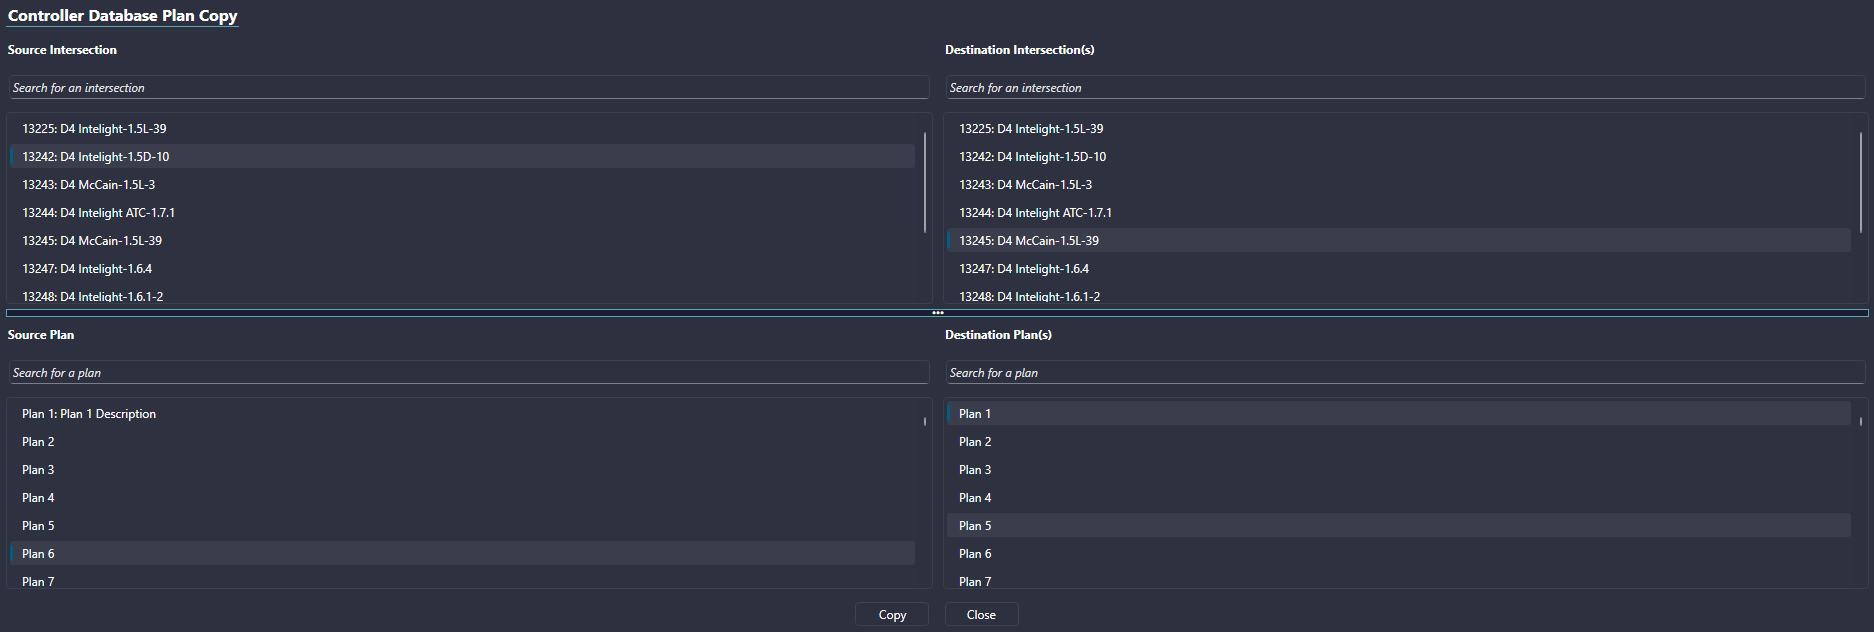
On the Intersections tab, within a controller page, locate the Copy feature and select Copy Plan (Note: Within MaxTime, plans are referred to as patterns).
In Copy Plan, select the source signal you would like to copy from, and the destination signal(s) you would like to copy to. Select a single source plan to copy from, and one or many destination plan(s) to copy to. Selecting the Copy button will implement the copy specified in the form. Selecting the Cancel button will close the form without implementing any changes.
¶ Excel Export
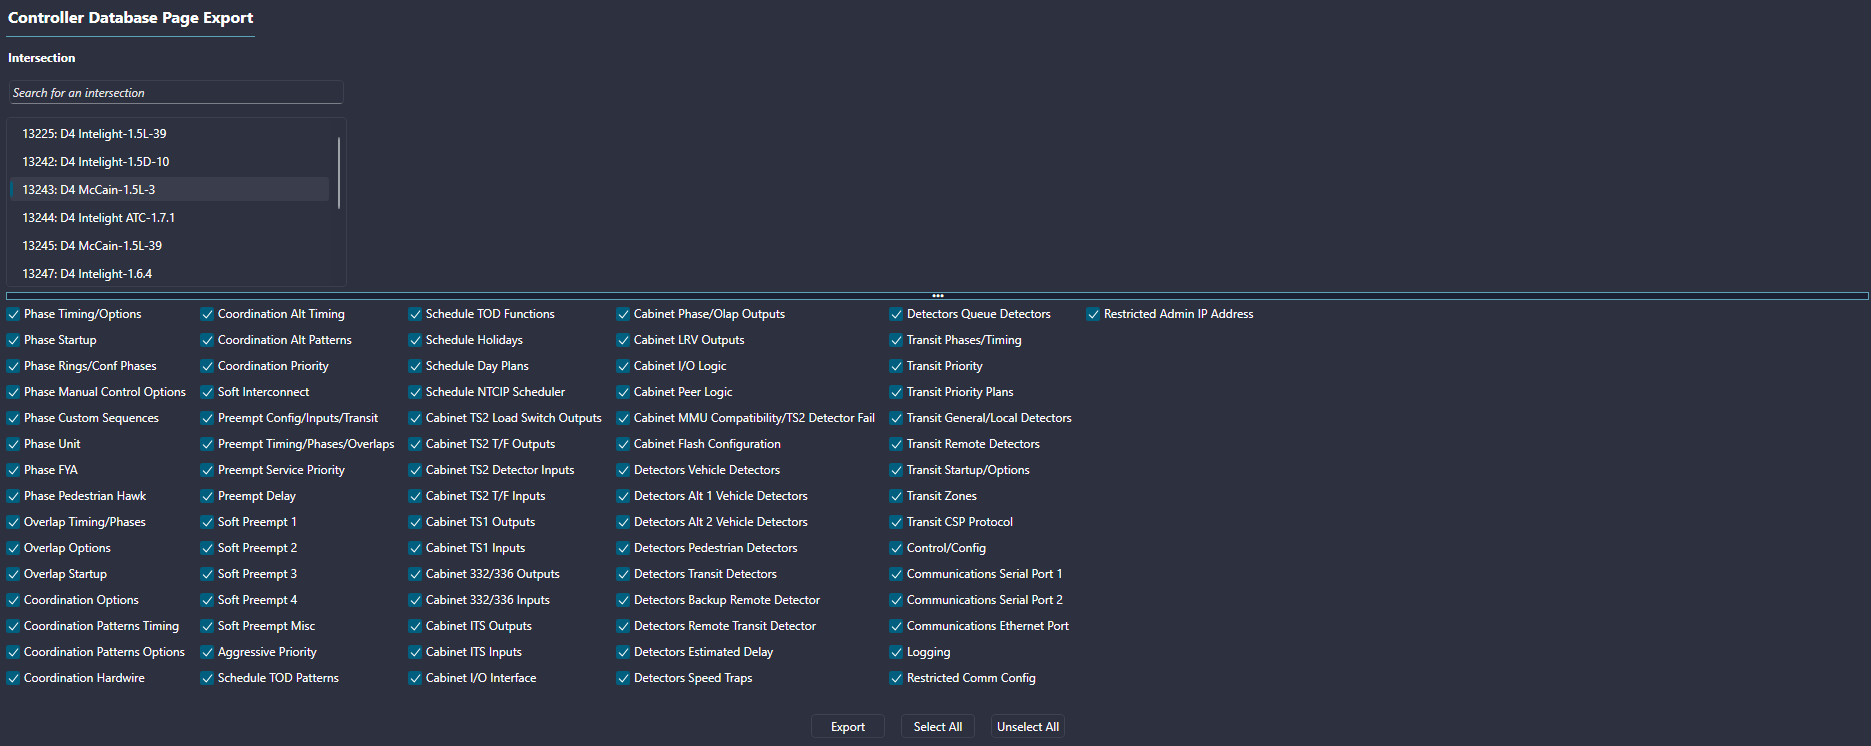
The Excel Export option allows the user to export all of the database screens to an Excel spreadsheet saved at a user-defined location.
On the intersection tab, within the controller type menu, select Batch then Excel Export. From the selection screen, select the intersection from where the data comes from, and then click the checkboxes associated with the controller pages which the user wants exported. Click Select All to have all the controller pages selected, or select Unselect All to deselected all the controller pages. Click Export to bring up a save dialog for where the excel spreadsheet will be saved, and click Save.
The Excel spreadsheet displays controller data organized into different tabs. Currently, the organization of the data will vary from controller type to controller type, as some have readily printable pages created, and others are “raw data.” Raw data referring to the data just being inserted into columns without it being organized into controller page like pages.
¶ Upload
Using the 'Upload' button shown above in the ribbon image, a user is able to compare the current parameters on the controller to the parameters saved in the database. This can be accomplished by uploading either the Current Page or All Pages.
If an upload transfer is successful and differences are found between the database and controller data, the user will be taken to the View Central Data view. KITS will show the differences in the UI highlighted in yellow. The “Central Data” is referring to the values stored in the agencies local database.
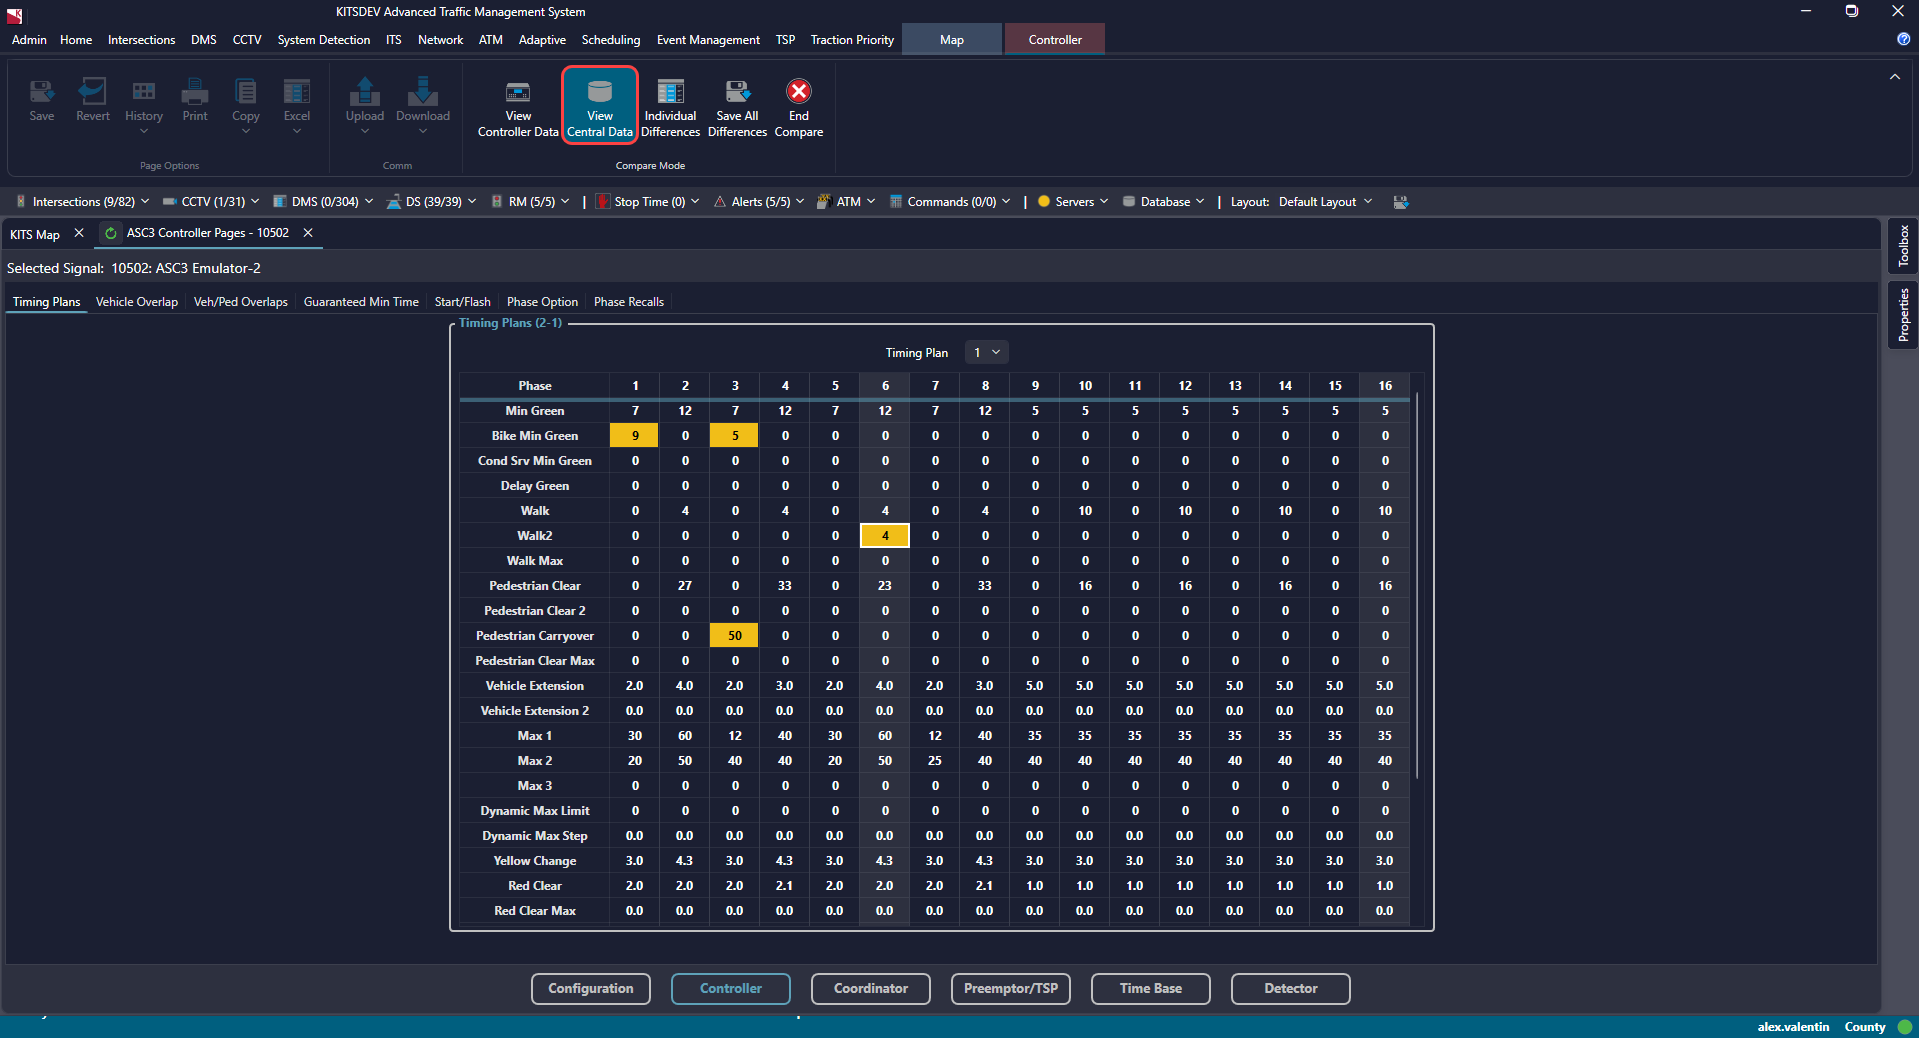
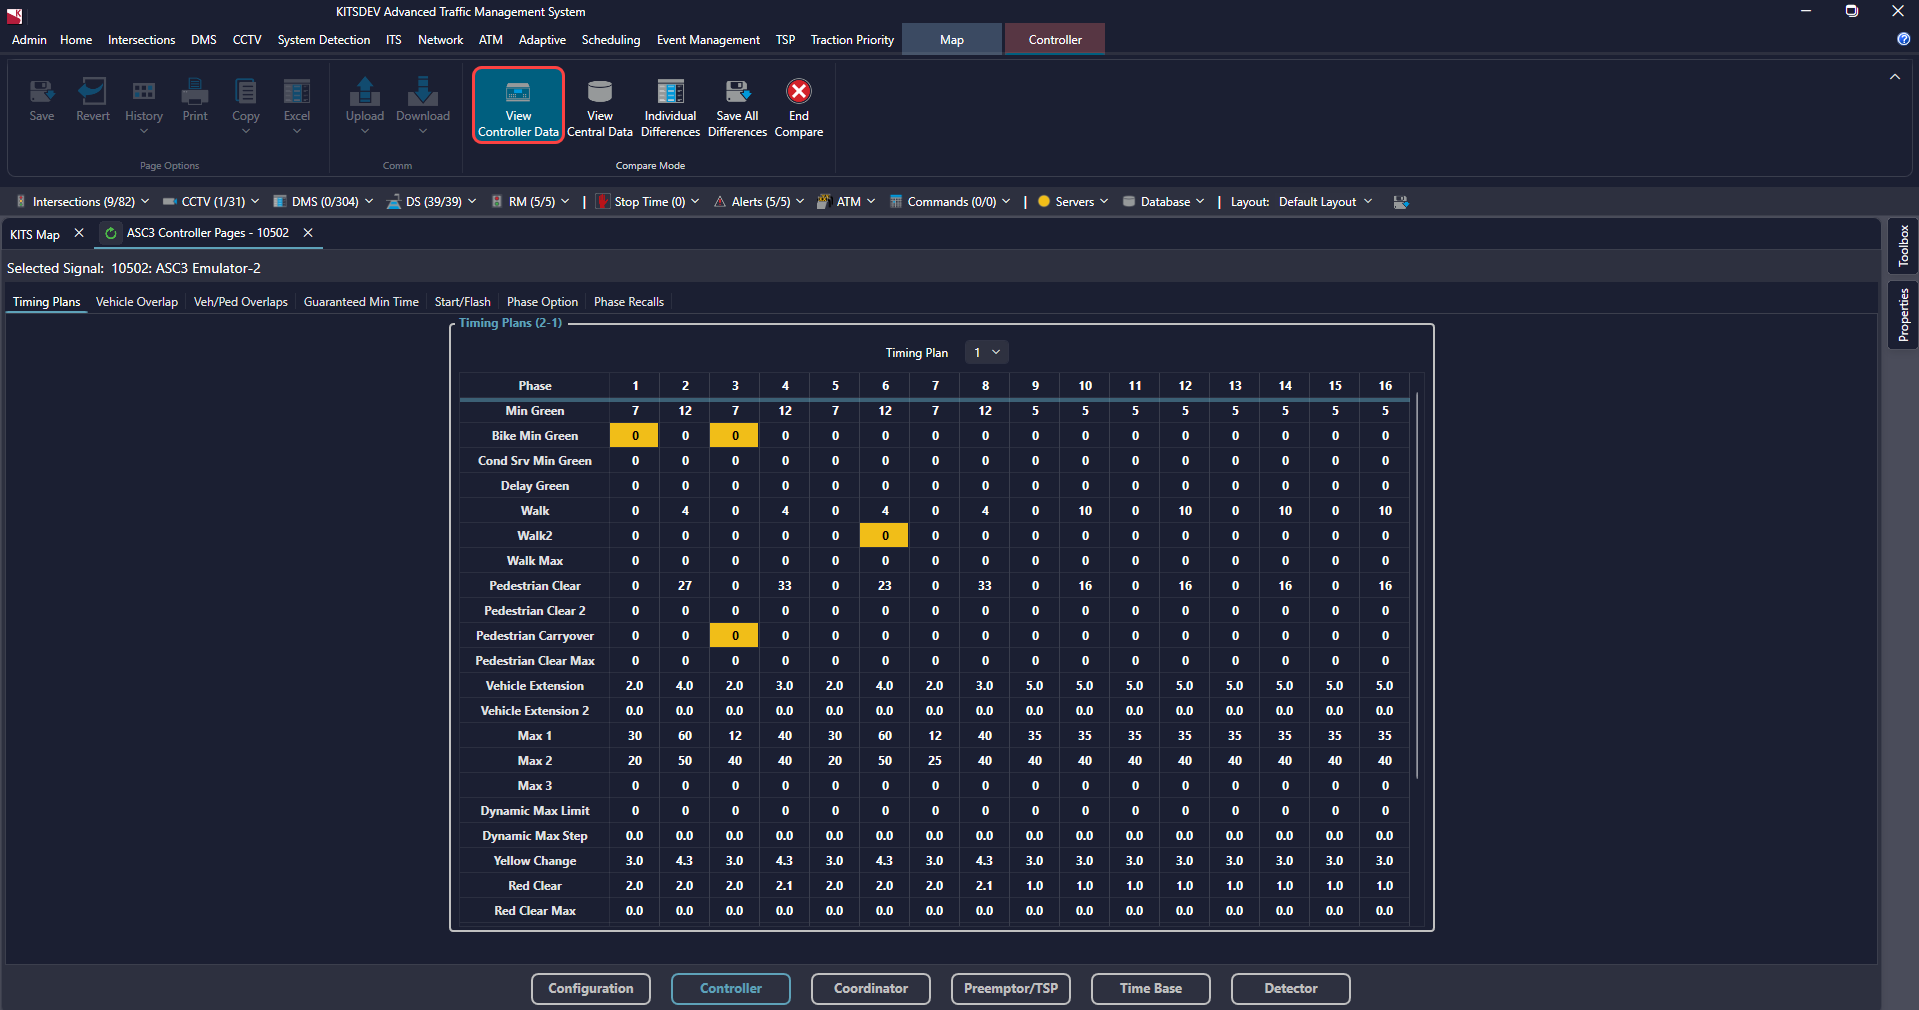
To change to controller data, click View Controller Data in the ribbon. KITS will then show the values that are currently on the controller, with the differences between the controller and central being highlighted in yellow.
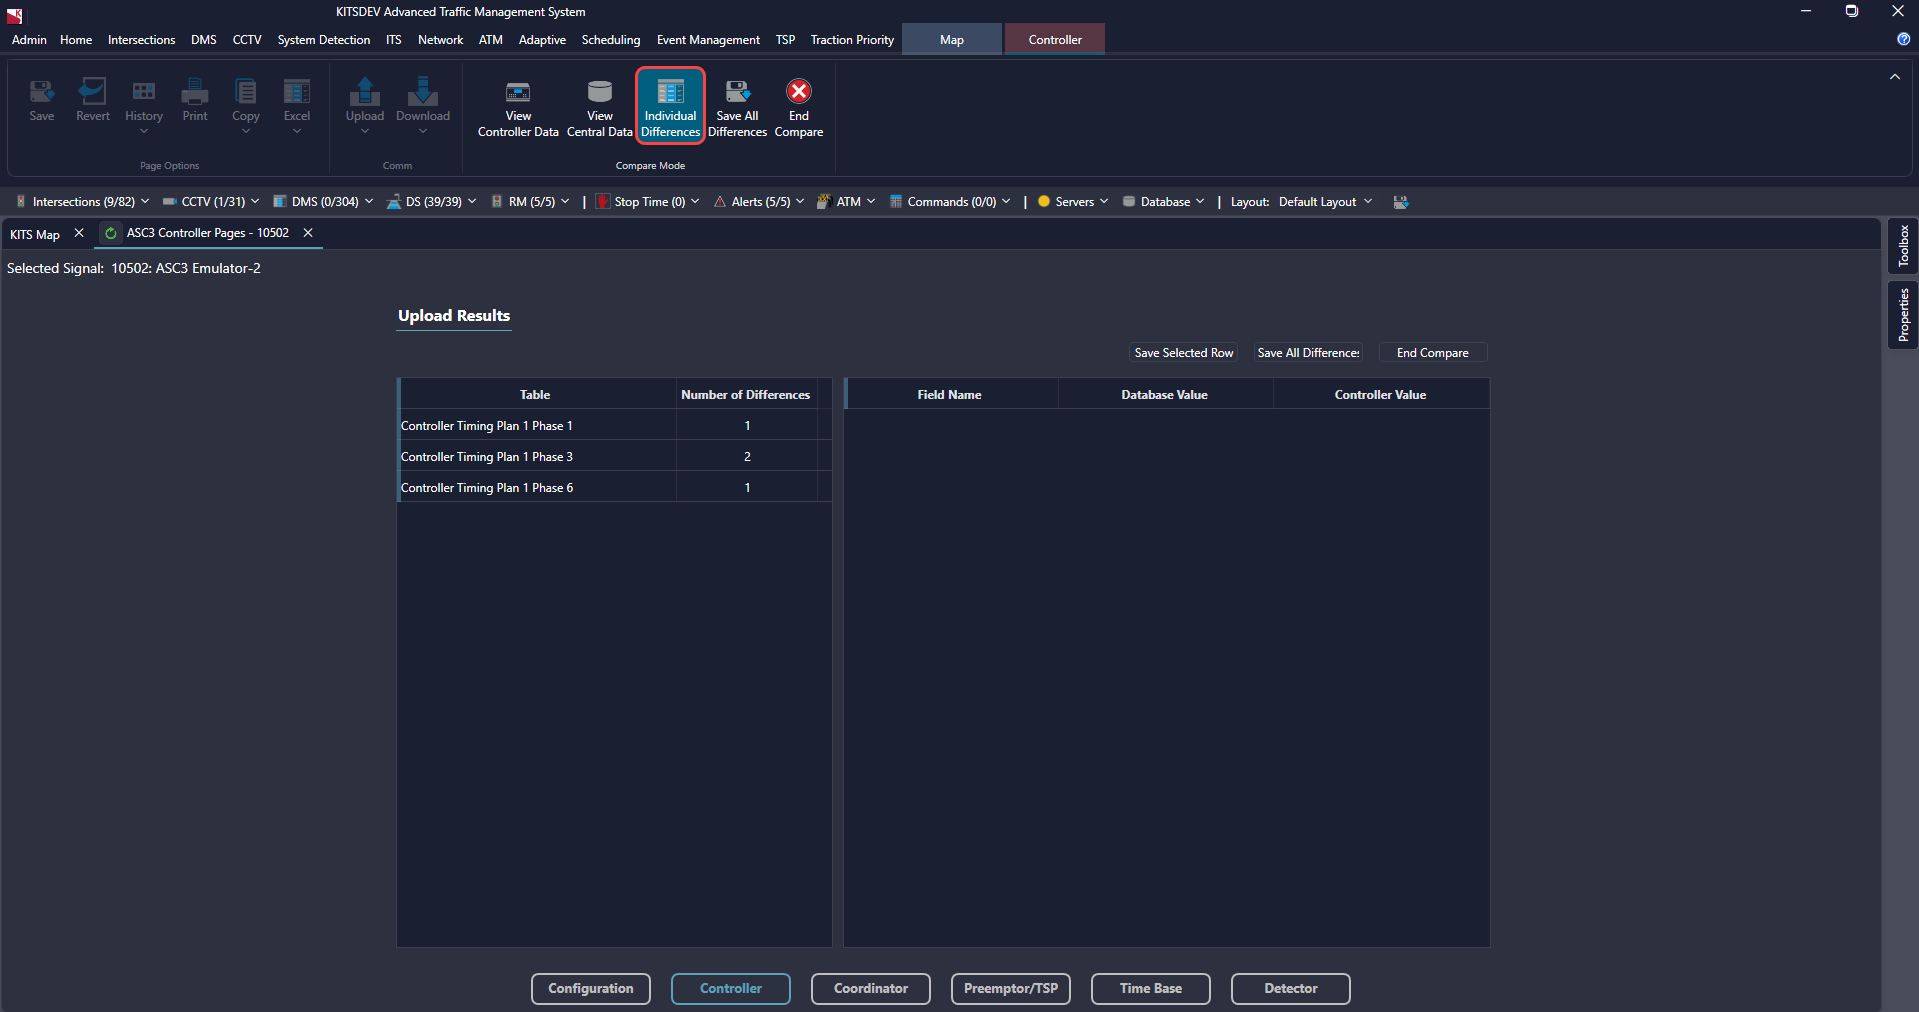
To see a list of all the differences found, click Individual Differences in the ribbon. This will take the user to the Upload Results view, where a user can save selected data, by clicking Save Selected Row, save all differences by clicking Save All Differences, or click End Compare to clear the upload results with no further saving.
¶ Download
The Download button has the option to send parameters to the controller by the Current Page or All Pages.
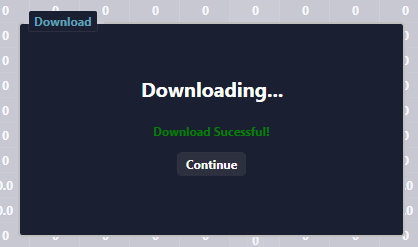
After selecting either Current or All, the window below is displayed showing progress.
When the Download completes successfully, the Download Successful message will be displayed.
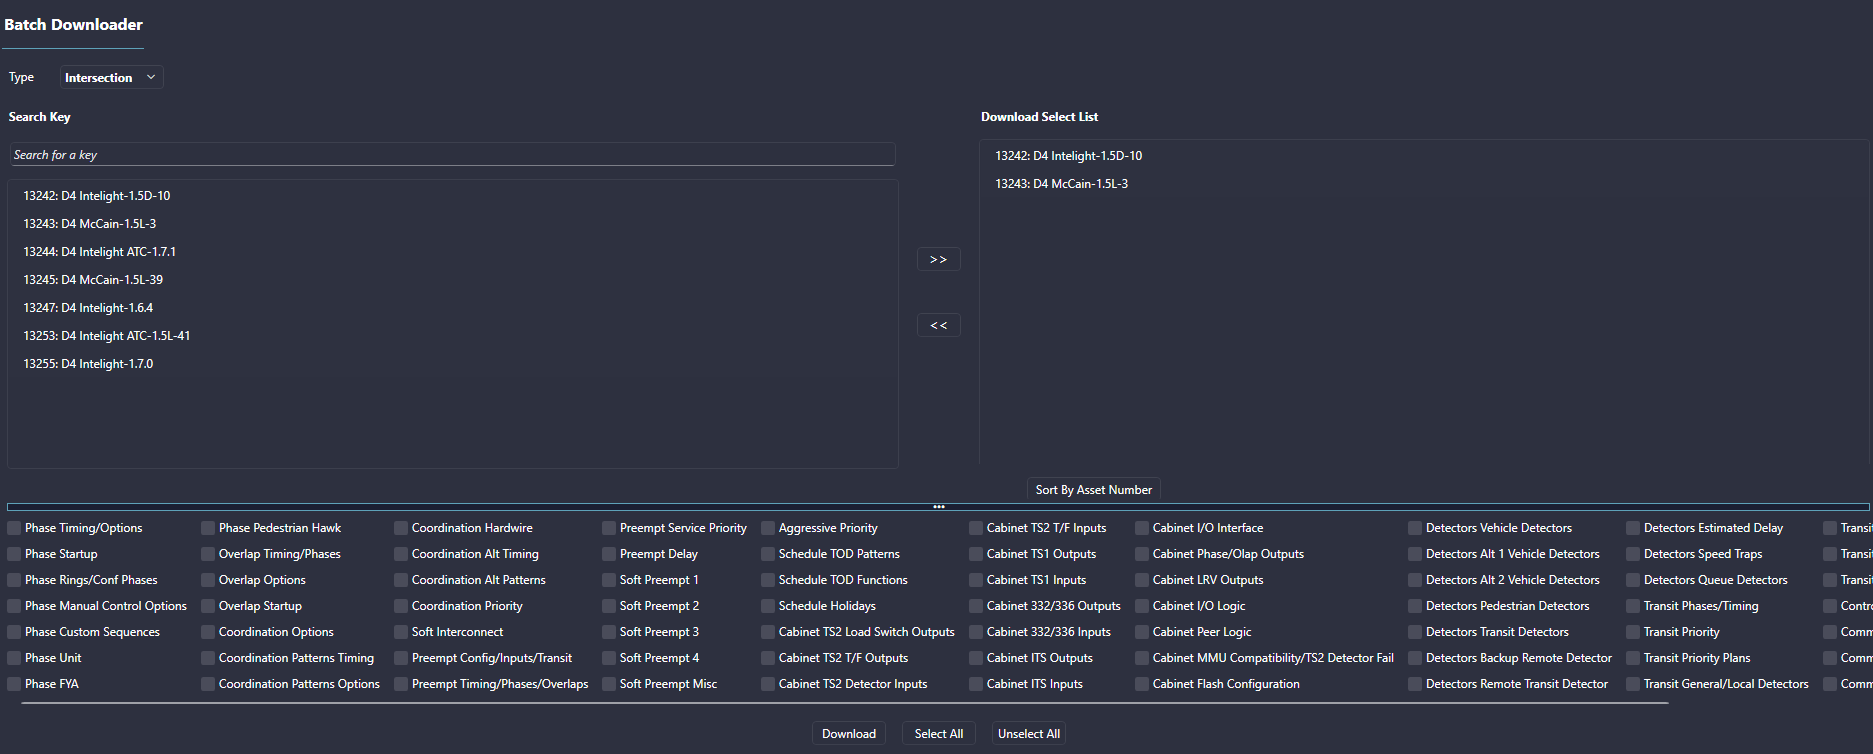
¶ Download Selected
The Download Selected option allows the user to select multiple signals to download the same selected controller pages at once.
On the intersection tab, within the controller type menu, select Batch then Download Selected.
Select intersections from the list on the left and move them to Download Select List on the right using the right arrows button. Intersections can also be removed by using the left arrows button. A search function may also be used to find intersections of interest. The default unit type is by Intersection, but the user may select zone, section, area, or arterial as needed.
Once the desired intersections are selected, the user may designate pages to include in the download. Users may select pages individually, Select All, or Unselect All with the buttons at the bottom of the form. Selecting Download will proceed with the download as defined.