¶ KITS Map
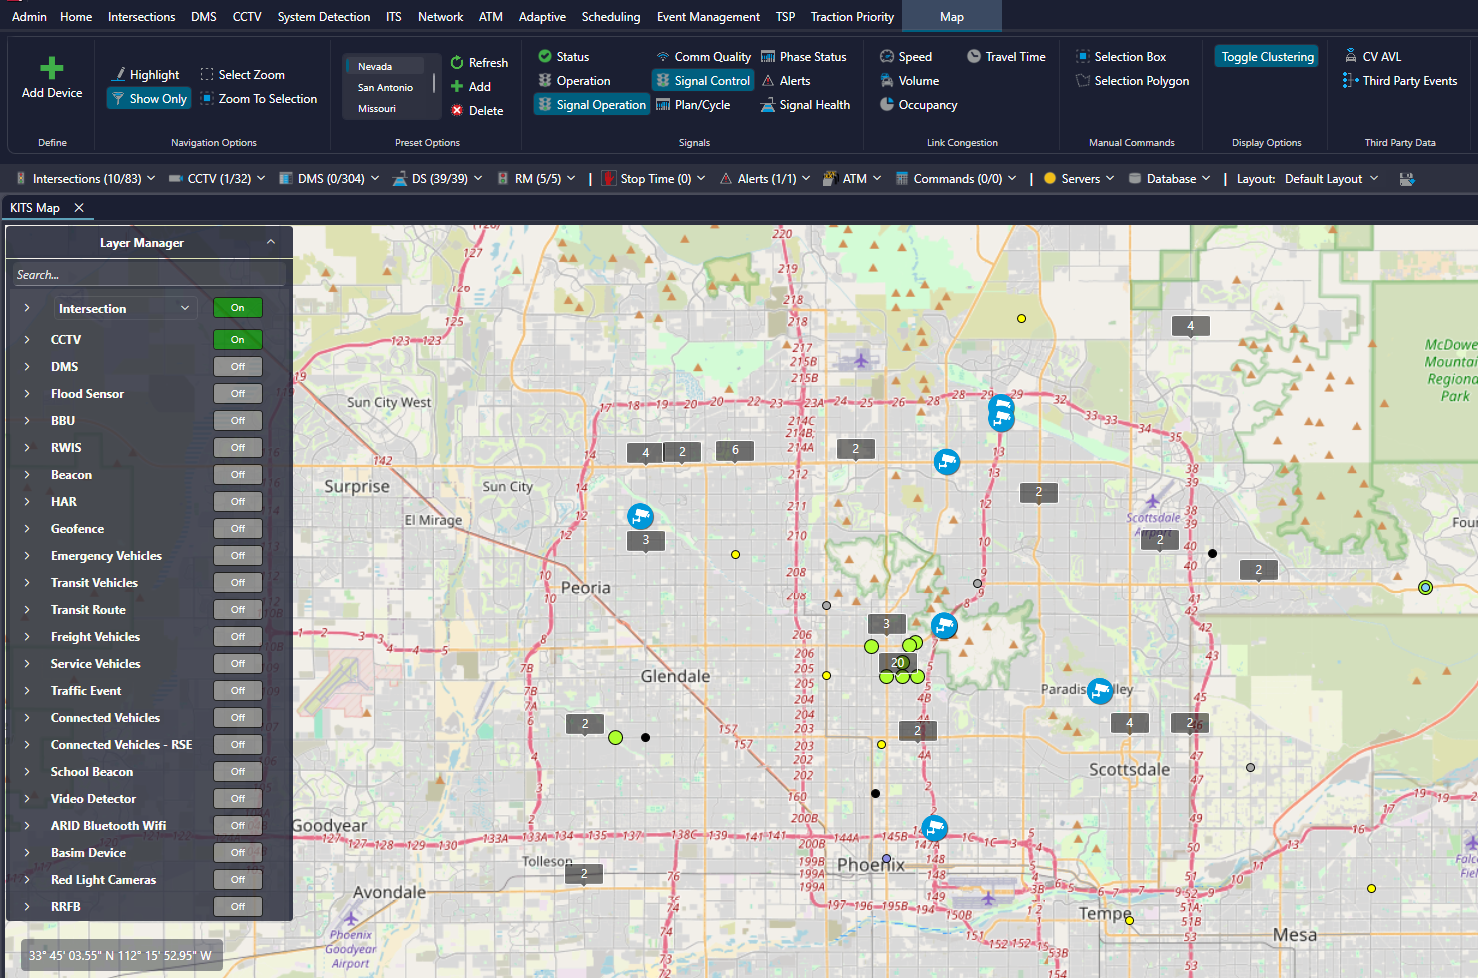
The KITS Map gives the user access to a map where they can view the Operation, Communication Quality, Control, Phase Status, Alerts, Signal Health, or Traffic for any intersection defined in KITS. Other ITS devices configured in KITS can also be viewed on the map.

¶ Map Controls
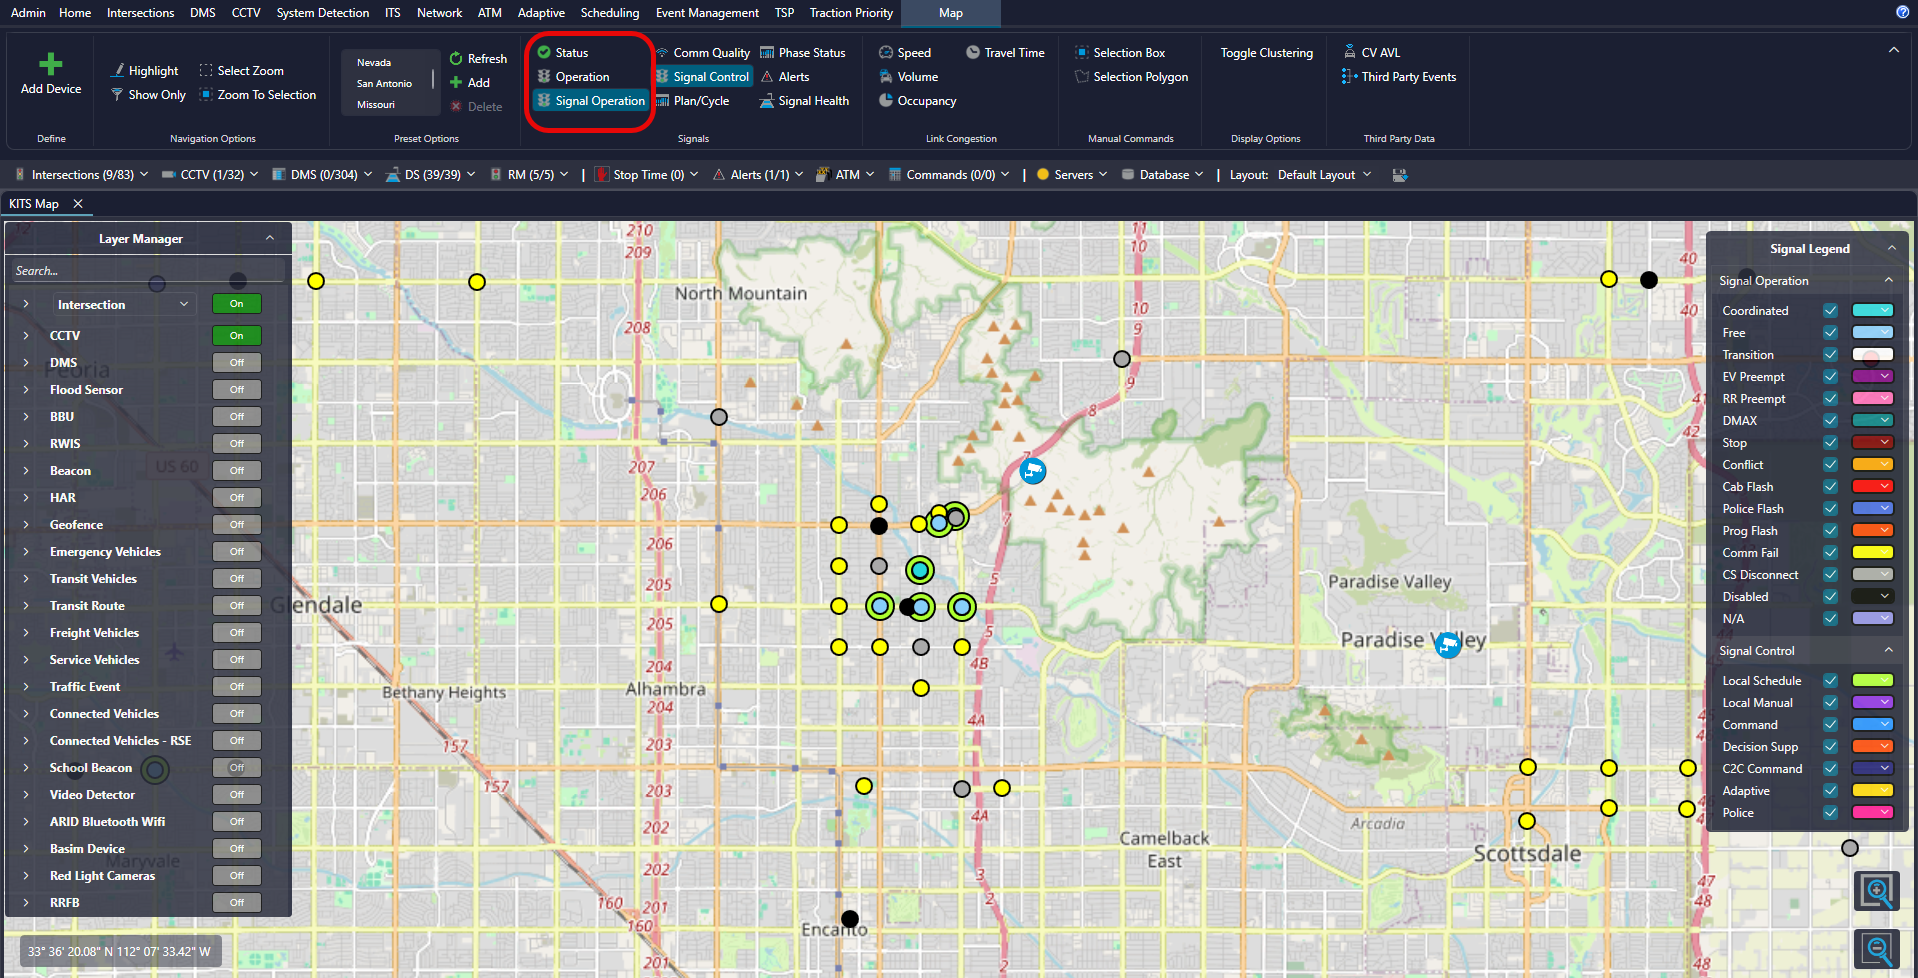
After opening the Map, a 'Map' tab will appear on the KITS ribbon. This tab contains many map controls and display options, with other controls available within the map window itself. To populate the map with intersections, click the Status, Operation, Signal Operation, Comm Quality, Signal Control, or Signal Health button under the Signals section.
The following table describes the various map controls and display options available on the Map tab.
| Control | Description |
| Add Device | Opens the device wizard from which Intersections and Links can be created |
| Navigation Options | Allows the user to navigate around the map in a variety of ways. Refer to the Navigation Options section for more information. |
| Preset Options | Allows the user to create and navigate to different map presets. Refer to the Map Presets section for more information. |
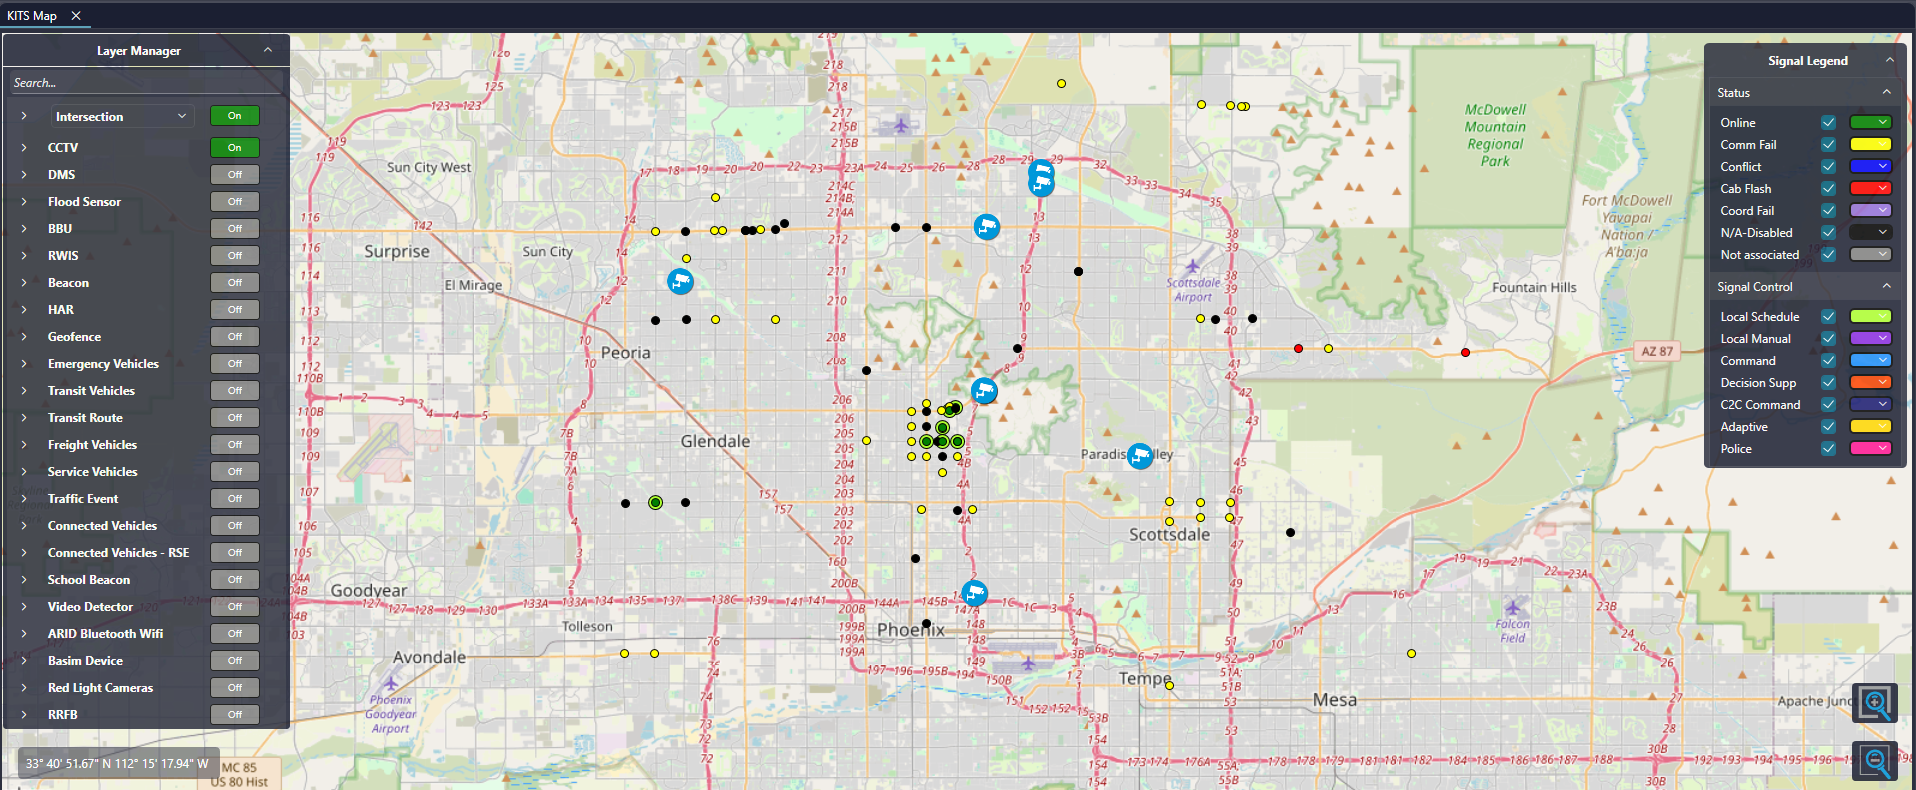
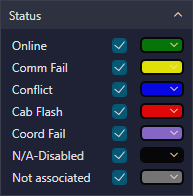
| Status | Populates the map with the Intersection Status layer (e.g. Online, Offline, Conflict, Flash, Coord Fail, Cont Fail, CM Fail, N/A) |
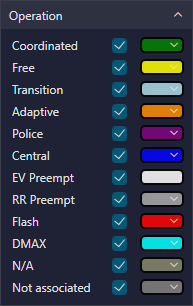
| Operation | Populates the map with the Intersection Operation layer (e.g. Normal, Free, Transition, Police, Manual, EV Preempt, RR Preempt, Low Priority, N/A) |
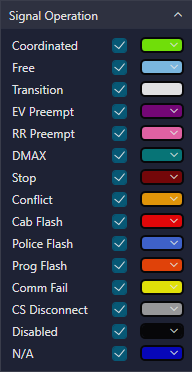
| Signal Operation | Populates the map with the Intersection Signal Operation layer (e.g. Coordinated, Free, Transition, EV Preempt, RR Preempt, DMAX, Stop, Conflict, Cab Flash, Programmed Flash, Comm Fail, CS Disconnect, Disabled, N/A) |
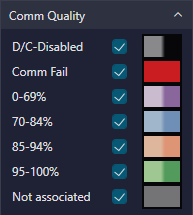
| Communications | Populates the map with the Communication Quality layer |
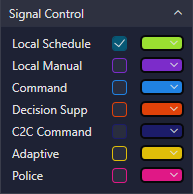
| Signal Control | Populates the map with the Intersection Control layer (e.g. Local Schedule, Local Manual, Central Command, Decision Support, C2C Command, Adaptive, Police) |
| Scheduling | Populates the map with the scheduling layer to indicate central scheduling status for each location. |
| Phase Status | Populates the map with the Phase Status layer (e.g. phase arrows) when Status, Operation, or Communications layer is shown. The phase arrows only draw on the map when zoomed in beyond a certain point |
| Alerts | Populates the map with the Alerts layer when Status, Operation, Signal Operation, or Communications layer is shown |
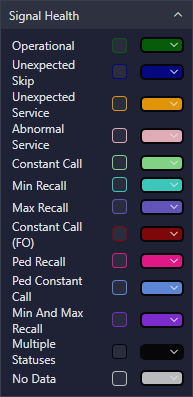
| Signal Health | Populates the map with the Signal Health layer (e.g. Operational, Unexpected Skip, Unexpected Service, Abnormal Service, Constant Call, Min Recall, Max Recall, Constant Call (FO), Ped Recall, Ped Constant Call, Min and Max Recall, Multiple Statuses, No Data) |
| Speed | If the system is configured to receive Bluetooth data from an external source, this option will show reported speeds on corresponding links when the Link layer is turned on. |
| Volume | If the system is configured to receive Bluetooth data from an external source, this option will show reported volumes on corresponding links when the Link layer is turned on. |
| Occupancy | If the system is configured to receive Bluetooth data from an external source, this option will show reported occupancy on corresponding links when the Link layer is turned on. |
| Travel Time | If the system is configured to receive Bluetooth data from an external source, this option will show reported the travel time between the start and end point on corresponding links when the Link layer is turned on. |
| Traffic | Populates the map with the traffic layer. This requires internet access and gives a visual representation of the flow of traffic throughout the city. |
¶ Right-Click Options
When right-clicking on the map, the available options will vary based on location. In the absence of an intersection or other device icon, right click options will include general options, while near a device icon, the options will pertain to the selected device.
When hovering over an intersection dot on the map, a simple text description will appear showing the intersection name and asset number. Right clicking the intersection dot will bring up the appropriate right-click menu for that location.
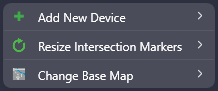
Additional right-click functionality includes the ability to add devices. When hovering over a desired location on the map, right-click select 'Add New Device', then choose a device. Using this method to add an intersection will open the Intersection Wizard in which a user can enter the required information to finalize the addition.
Also, an operator can use the right-click menu on the map to Resize Intersection Markers either larger or smaller.
The right-click menu also offers the option to change the base map. The user may select among road maps, aerial images, and hybrids.
For more information on the intersection specific right-click menus, refer to the Right-Click Options page.
¶ Map Legend
The Map Legend can be found in the top-right corner of the KITS Map (as shown in the screenshot at the top of this page). The legend will show different information depending on which layers are visible on the map. To customize the color for a given entry in the legend, simply click the color box and select the desired color. Once this has been done, the new color will be saved and will remain in effect for that user until it is changed again. The legends available are:
¶ Signal Operation
¶ Status
¶ Operation
¶ Signal Control
¶ Communication
¶ Signal Health
¶ Map Presets
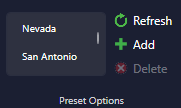
Use the Map Presets option to save preferable views of the map. This allows for a quick way to change the map to a desired region. Map Presets is located within the 'Map' tab on the main menu ribbon.
| Control | Description |
| Refresh | Refreshes the map view back to the currently selected preset's view |
| Select Preset | Sets the map view to a preset that is available from the list of saved presets |
| Add | Saves the current map view as a preset and adds this preset map view to the list of available map presets |
| Delete | Deletes the preset map view that is currently selected in the list of map presets |
| Rename | Right-click on a preset to access the option to rename it. |
¶ Adding a Preset
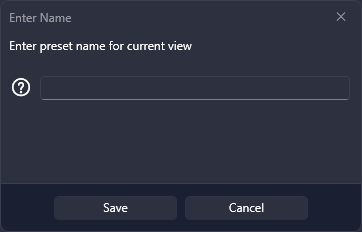
To add a preset map, first open a KITS Map tab. On the KITS Map navigate to the area of the map that is to be saved and adjust the zoom setting of the location. Once the view is set, select the 'Add' button. This will bring up a text field to enter the name of the preset. After a name has been entered select the 'Save' button. To cancel the preset select the 'Cancel' button.
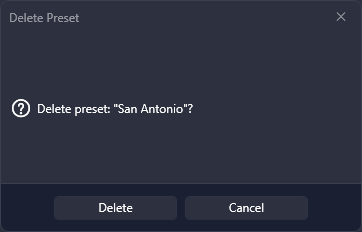
¶ Deleting a Preset
To delete a preset map, select the desired preset from the list of available presets. After the preset is selected, press the delete button. A window to delete the preset will appear and select 'Delete' button. To cancel the delete, select the 'Cancel' button within the window.

¶ Navigation Options
The Navigation Options available for the map include the mouse navigation features, features in the ribbon menu, and buttons in the corner of the map.
| Action | Methods |
| Zoom In |
Use the mouse wheel, or Use the button in the lower right corner of the map |
| Zoom Out |
Use the mouse wheel, or Use the button in the lower right corner of the map |
| Pan | Click and drag on the map. |
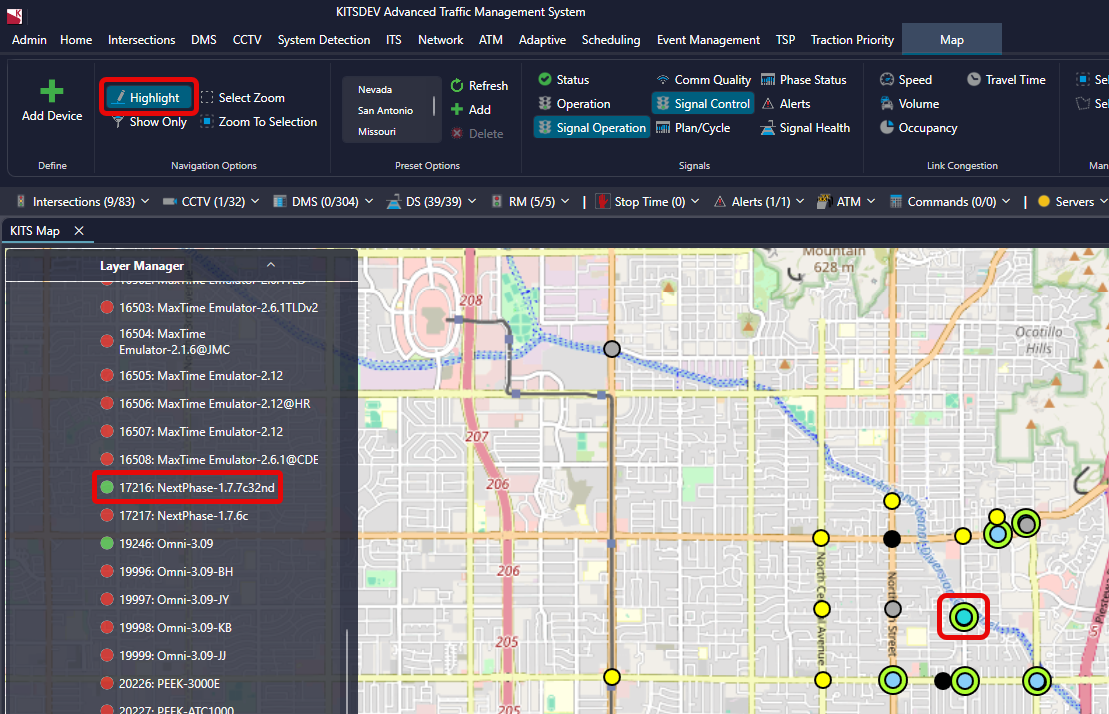
To use the Highlight, Show Only, or Zoom to Selection options in the ribbon menu, first select one or more devices from the Layer Manager. The table below indicates what each option does, as well as constraints on selected device type or quantity.
| Control | Description | Limits |
| Highlight | Increases the size of the markers for the selected intersection(s) or link(s) |
Intersection or Links Can select multiple |
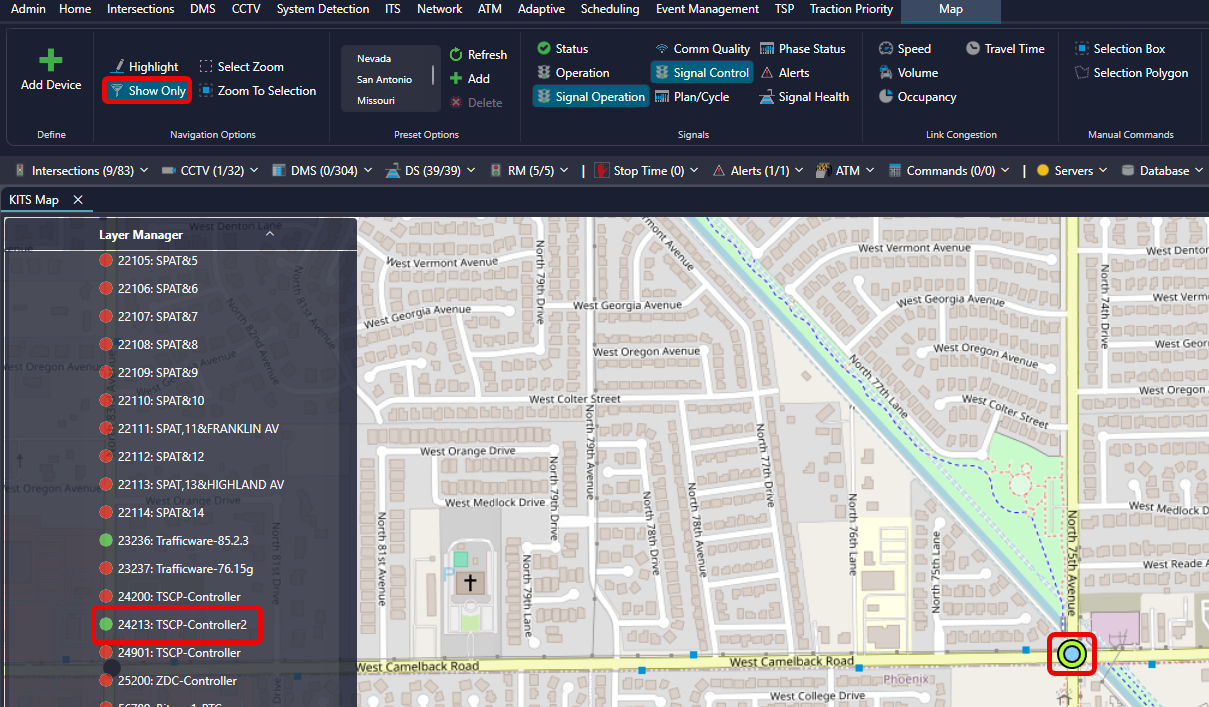
| Show Only | Hides unselected items in the layer from view, showing only those selected devices. |
Any device type Can select multiple |
| Zoom to Selection | Moves the map to a close focus on the selected intersection or device. |
Any device type Select a single device |
| Select Zoom | Allows a rectangle to be defined by clicking and dragging on the map, and then zooms into that area. | N/A |
¶ Layer Manager
The Layer Manager is found in the upper left corner of the map. It may be minimized or expanded using the arrow icon to the left of the name. Similarly, the device list for a layer may be expanded or collapsed using the arrow to the left of the device type.
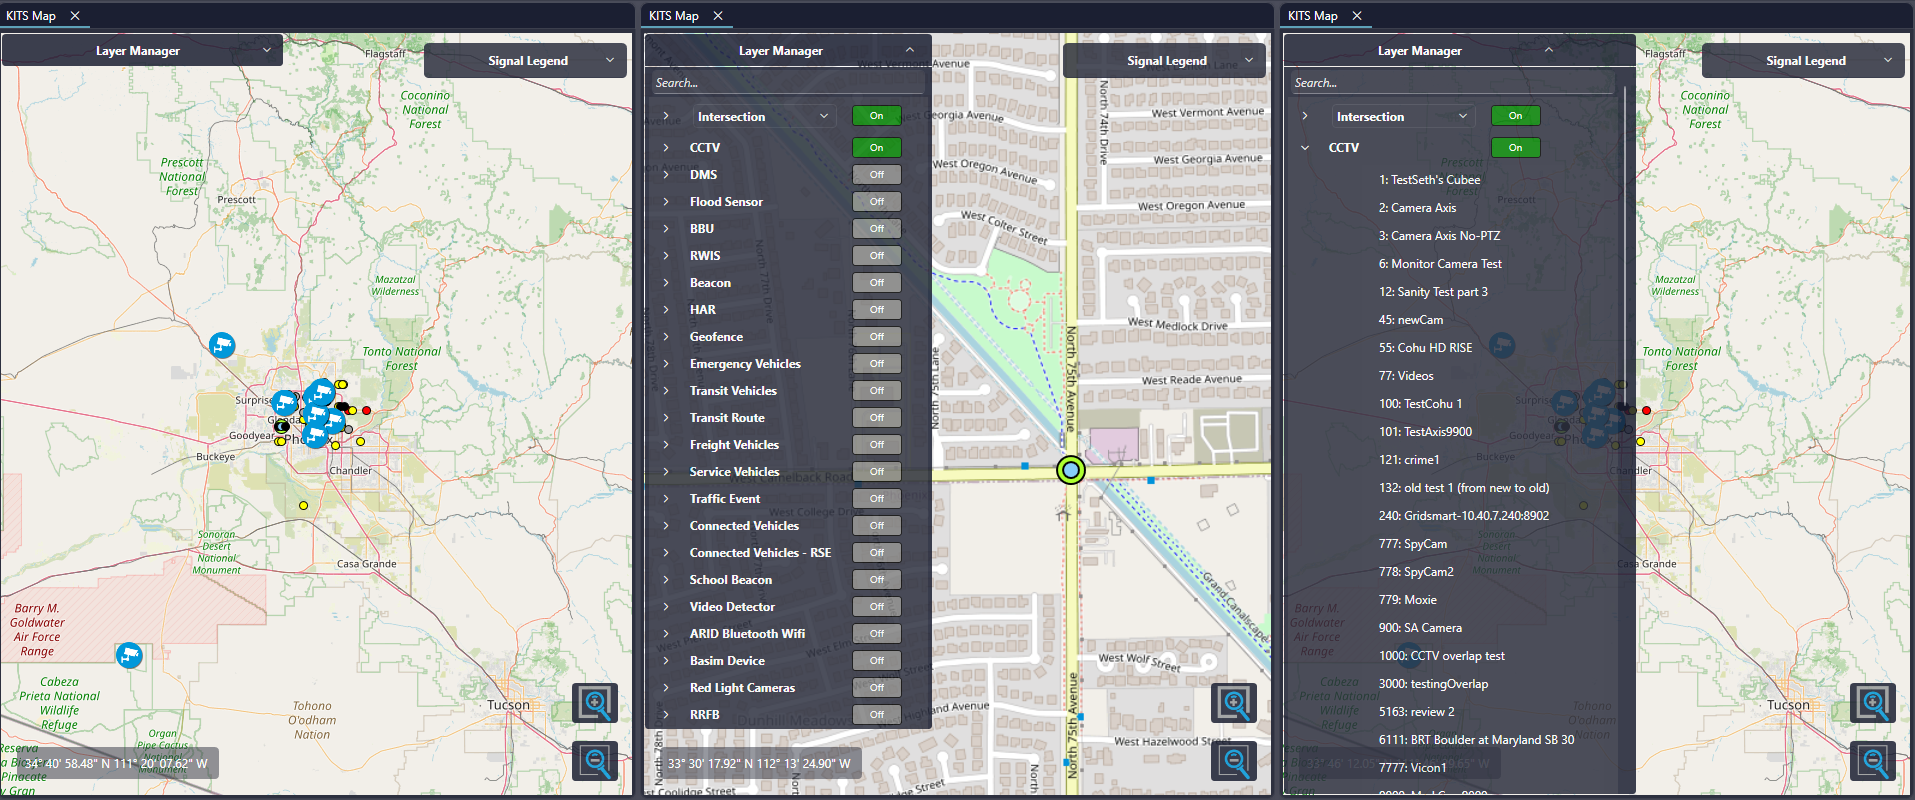
The Layer Manager consists of a search bar, followed by a list of device types. A phrase or partial asset ID may be typed into the search bar, which will then display all matching device entries under each available device type. For ease of navigation in the search results, the arrows to minimize results from specific device types may be used.
On the right of each device type is an indication of whether the layer is showing on the map (On or Off).
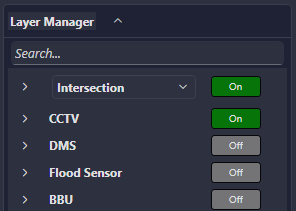
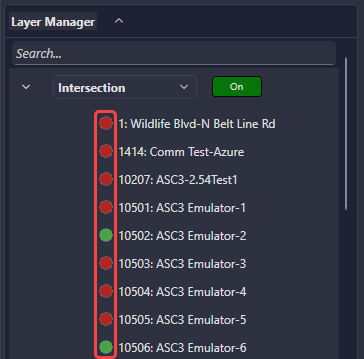
In the Layer Manager, the intersections show a small circle next to each name. A green circle indicates that the intersection is online and a red circle indicates that the intersection is offline.
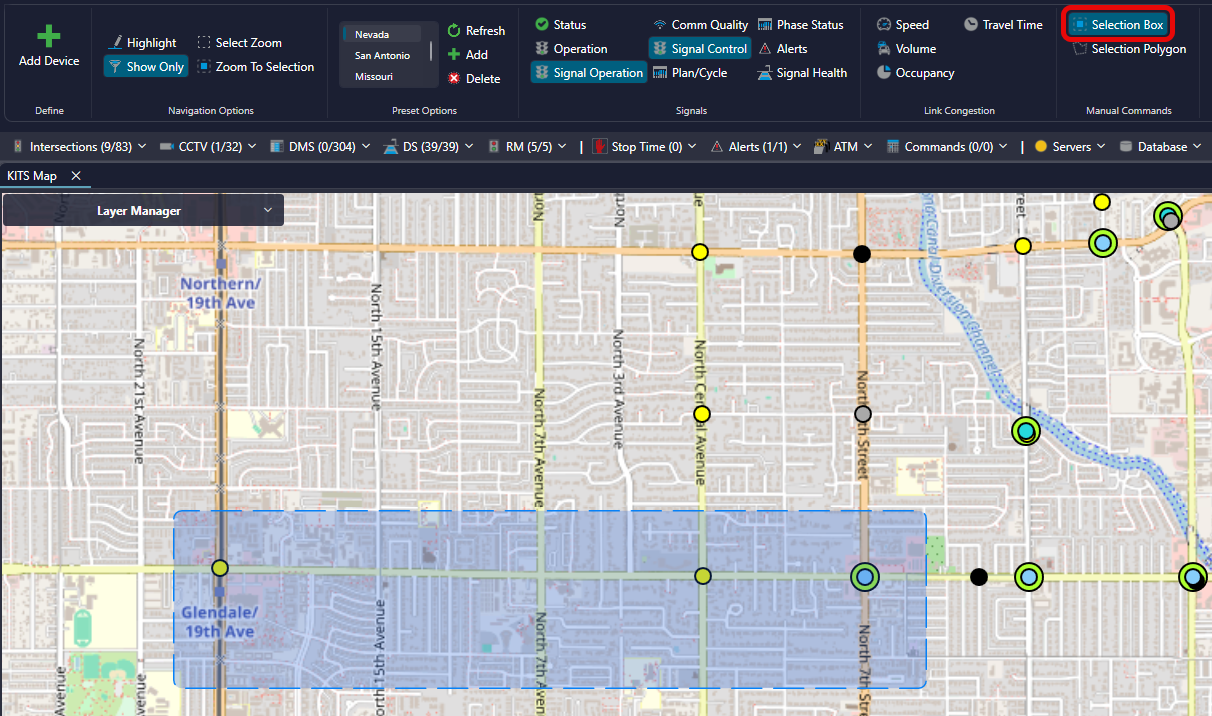
¶ Manual Commands
The manual commands buttons allow users to select multiple signals in the map view using a selection box or polygon, with the intention of editing those signals timings or by sending a central command.
To make a selection using a selection box, select Selection Box in the Manual Commands group, then click and drag around the signals to make a selection.
To make a selection using a polygon, select Selection Polygon in the Manual Command group, then click a point on the map, and then another point, and another point, to draw a selection polygon around the points clicked on the map.
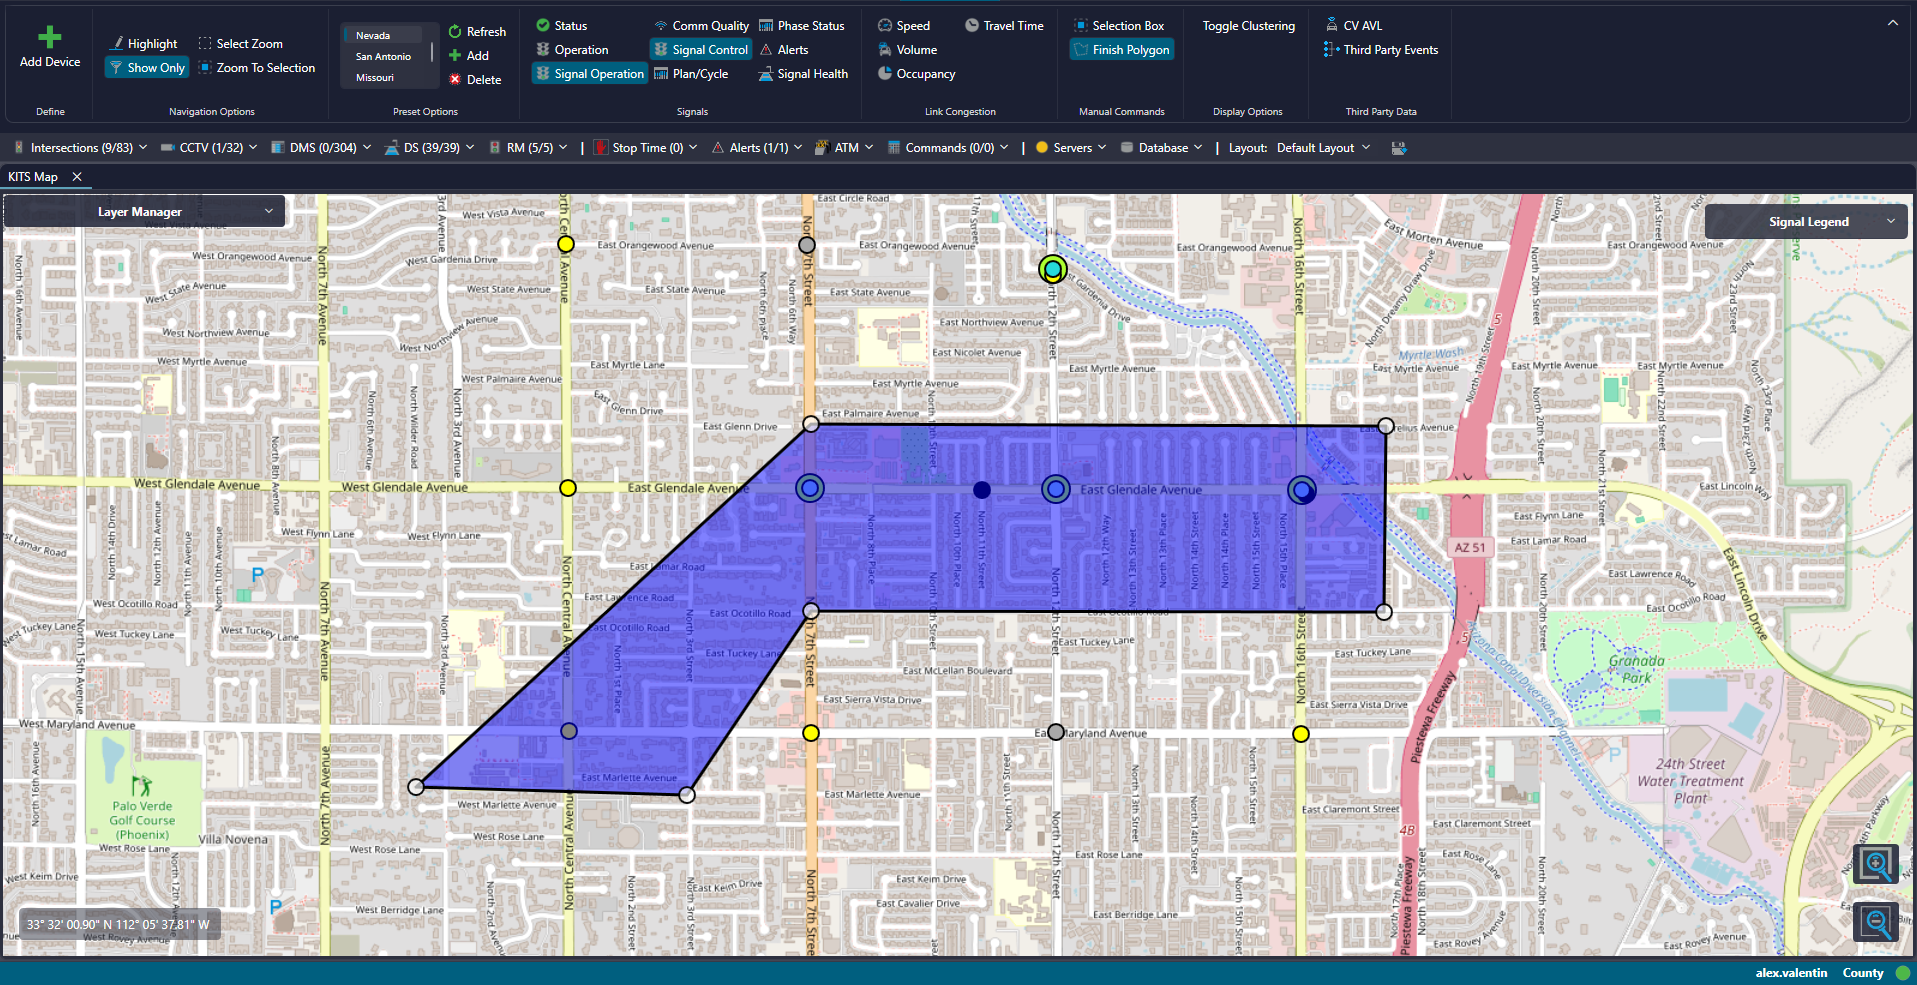
Once a selection is made, a prompt with the selected signals will appear.
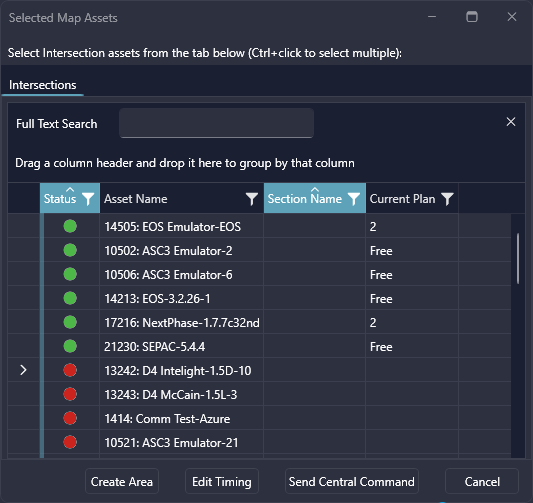
There is the option to Edit Timing, which will take a user to Section Timing Editor, with the signals selected, or Send Central Command, which will open up the Manual Command prompt.
¶ Display Options
Currently under Display Options is only Toggle Clustering. When Toggle Clustering is checked, instead of displaying signal dots, a box with the total amount of signals within a cluster of close proximity will be displayed when zoomed out.